Importance of a Detailed Painting Invoice
A painting invoice is more than a payment request; it is a detailed record of the services performed, the costs involved, and the agreed payment terms. It helps keep both you and your client on the same page regarding the scope of work and the financial obligations. A complete and professionally crafted invoice reduces confusion, improves transparency, and can help avoid payment delays.
Clients appreciate clarity and professionalism. A well-written invoice shows that you take your work seriously. It can reinforce your credibility and encourage repeat business or referrals. For self-employed painters or small business owners, this level of professionalism can set you apart from competitors.
In addition, painting invoices serve as valuable documentation for legal and financial purposes. They can help resolve disputes, serve as proof of income for tax filings, and provide evidence in case of litigation or disagreements.
Preparing Your Business for Invoicing
Before sending out your first invoice, take a few preparatory steps to make the process smoother. First, ensure that you have all necessary business identifiers, including your business name, a trade name if applicable, and complete contact details such as address, phone number, and email. Even if you don’t operate from a commercial location, using a P.O. Box or your home address is acceptable.
Next, decide whether you will use digital templates or create invoices manually. Manual invoicing may work for very small operations, but as your business grows, having a system to track and organize invoices becomes essential. Using invoicing tools or document templates can significantly speed up the process.
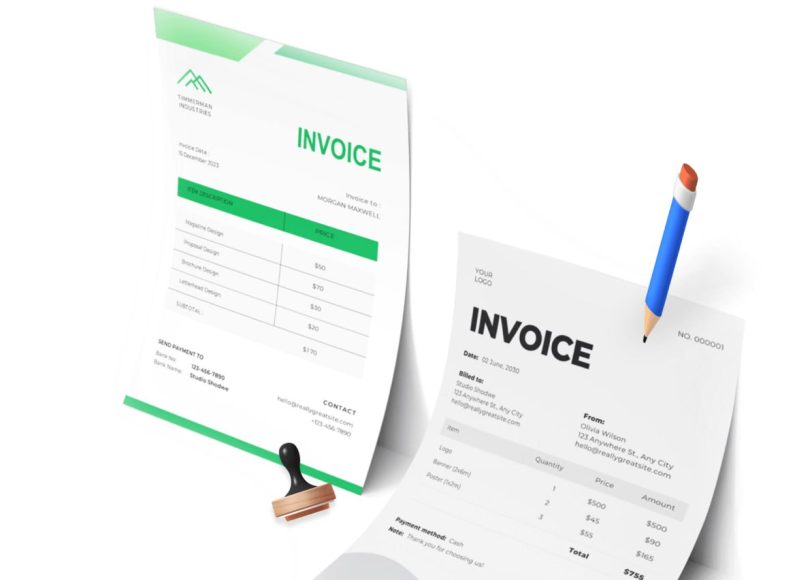
Essential Components of a Painting Invoice
Every professional invoice should contain key components to ensure that it meets both your needs and your client’s expectations. Skipping any of these can lead to misunderstandings or payment delays.
Business Name and Contact Details
Start your invoice with your business name, followed by your personal name if you’re self-employed. Below that, include your full contact details. This information helps the client identify you and provides ways to get in touch if they have questions. It also gives your invoice a formal, professional appearance.
Client Information
Next, include the client’s full name and billing address. Always verify these details before finalizing the invoice. If the job was performed at a different location, you should list the project address separately. Distinguishing between the billing and project address is especially important for commercial or property management clients.
Invoice Number and Date
Each invoice must have a unique identifying number. This makes it easier for both you and the client to track payments and reference specific jobs. There are various numbering strategies you can use:
- Sequential numbering (e.g., 0001, 0002)
- Date-based numbering (e.g., 062125-001)
- Client-based numbering (e.g., SMITH-001)
Also include the date the invoice was issued. This is essential for calculating due dates and setting payment expectations.
Description of Services Provided
The core of your invoice should detail what work was done. Break down your services into line items. Use concise but specific descriptions for each task, such as:
- Prepped and painted two-bedroom apartment
- Scraped, sanded, and painted exterior window trim
- Applied primer and topcoat on living room walls
Avoid vague descriptions like “painting services”—specificity helps your client understand the value they’re receiving.
Hours Worked (If Applicable)
If you charge clients by the hour, include the number of hours worked for each task. This helps justify the costs and gives clients confidence that they are being billed fairly. If your rate is fixed or project-based, you can omit this section.
Pricing and Total Amount Due
List the price for each service next to its description. At the bottom of the invoice, calculate the subtotal. If applicable, add a separate line for taxes. Then, present the grand total—the final amount due from the client.
If you’re offering a discount or need to include extra charges (such as materials or travel fees), make sure those are clearly itemized. Transparency reduces the chances of disputes or questions.
Tax Information
Depending on your location, painting services may be subject to sales tax. If this applies to your business, include a line that specifies the tax rate and amount. Ensure your tax calculations are accurate and compliant with local regulations.
Payment Instructions
Your invoice should clearly indicate how the client can pay you. Include the following details:
- Accepted payment methods (e.g., cash, check, bank transfer)
- Any necessary payment information such as bank account numbers or mailing addresses
Make it as easy as possible for the client to send you the money. If the process is complicated or unclear, it can delay payment.
Payment Terms and Conditions
List your payment terms to set expectations. These can include:
- Payment due date (e.g., due within 15 or 30 days)
- Penalties for late payments (e.g., interest or flat fee)
- Discounts for early payments (e.g., 5% off if paid within 10 days)
Clear terms protect both parties and help you maintain consistent cash flow. They also act as a legal safeguard in the event of non-payment.
Customer Signature Section
Although not always required, having the client sign the invoice upon job completion can serve as an acknowledgment that the work was completed to their satisfaction. It also acts as a basic contract confirming their agreement to pay the listed amount.
This can be especially helpful for larger projects or clients you haven’t worked with before. A signed invoice can serve as proof in case a payment dispute arises.
Adding a Personal Touch
Consider adding a short thank-you note at the end of your invoice. A simple message like “Thank you for your business” or “We appreciate the opportunity to work with you” can go a long way in building rapport.
It leaves your client with a positive impression and may encourage them to work with you again. This human touch contrasts nicely with the formal structure of the rest of the invoice and reinforces your customer service values.
When and How to Send the Invoice
Timing is crucial when it comes to sending invoices. Ideally, the invoice should be sent immediately upon completing the job. The faster you send the invoice, the faster you’re likely to get paid. It also ensures that the details of the job are still fresh in the client’s mind.
Email is the most common method for sending invoices today. It’s fast, cost-effective, and allows you to keep a digital record. If your client prefers a physical copy, you can also send one by mail, but make sure to confirm their preference beforehand.
Having a reliable method of tracking whether your invoice has been received and opened is also helpful. This helps you determine the right time to follow up if the payment is delayed.
Keeping Accurate Records
Once your invoice is sent, store a copy in your records. Keep both digital and physical backups if possible. Good recordkeeping is vital for managing your finances, preparing taxes, and resolving any potential disputes. Organized records also make it easier to analyze your business performance over time.
Develop a consistent naming and filing system. You might organize invoices by year, client name, or job type. This makes retrieval simple when you need to reference past work.
Preparing for Growth
As your painting business grows, having a streamlined invoicing process becomes even more important. The more clients and jobs you manage, the more invoices you’ll generate. Keeping everything organized from the start saves you countless hours in the long run.
Templates, digital records, and defined procedures make it easier to delegate tasks as you expand. A solid invoicing foundation allows you to focus more on delivering high-quality painting work and less on administrative tasks.
Setting up proper invoice practices from the beginning not only improves your cash flow but also enhances your reputation. Clients will notice and appreciate your professionalism, increasing the likelihood of repeat business and referrals.
As you become more comfortable with the process, you can customize and refine your invoices to suit different types of clients or services. With experience, invoicing becomes second nature, freeing you to focus on what you do best: painting.
Structuring Your Painting Invoice for Clarity and Impact
A well-structured painting invoice does more than list services—it provides a clear narrative of the project from start to finish. This approach reduces confusion, builds trust with your client, and helps ensure timely payments. We’ll delve into how to structure your painting invoice for maximum effectiveness.
Starting with the Header: Branding and Business Information
The header is your first chance to leave a strong impression. It should include your business name prominently at the top. If you use a logo, place it alongside or above your name for added professionalism. Follow this with your contact information—address, phone number, and email.
Make sure this section is clean and not cluttered. Use a readable font and arrange the information logically. A well-designed header helps establish trust and confirms to the client that they are working with a serious and reliable service provider.
Including the Client’s Information
Below are your own details, including the client’s full name, billing address, and contact information. It’s essential to double-check these details for accuracy. Invoices with incorrect or outdated client information can lead to confusion or delayed payments.
If the project took place at a different location, clearly label and include the project address. For larger or multi-location projects, consider using job codes or project numbers to reference specific sites.
Assigning a Clear Invoice Number
Assigning a unique invoice number to each job keeps your records organized and helps clients when referencing your bill. You can adopt different systems depending on your preferences:
- Simple numerical order (001, 002)
- Including date and job code (062125-WTR01)
- Adding client initials or name abbreviation (JSMITH-004)
Consistency in your numbering system helps both internal and external parties stay on track with billing, tracking, and dispute resolution.
Adding the Date of Issue and Due Date
Your invoice should display both the date it was issued and the payment due date. The issue date marks when the billing occurred, while the due date communicates when payment is expected. This sets a clear timeline and minimizes confusion for clients.
Common payment terms include:
- Net 15: Payment due within 15 days
- Net 30: Payment due within 30 days
- Due on receipt
The payment timeline you choose should reflect your business policy while considering what is fair and customary in your market.
Detailed Line Items: Transparency Builds Trust
Each line item on your invoice should describe a specific service provided or material used. This is where you justify your charges and show the value of your work. Use clear, client-friendly language that describes:
- What was painted (e.g., interior walls, ceilings, window trim)
- Preparation work (e.g., sanding, priming, pressure washing)
- Materials supplied (e.g., paint, brushes, protective coverings)
Avoid generic terms like “painting labor” or “miscellaneous materials.” Instead, list entries such as “Primed and painted 250 sq ft of living room wall” or “Supplied and applied two coats of semi-gloss latex paint.”
Unit Costs and Totals
Next to each line item, include the corresponding cost. Depending on your pricing model, this might be:
- A flat fee for the task
- An hourly rate multiplied by the number of hours worked
- A cost per square foot
For each entry, calculate and list the total for that specific service. At the bottom, summarize the following:
- Subtotal (sum of all line items)
- Any applicable taxes
- Discounts or promotional reductions
- Total amount due
This structure allows the client to see exactly how you arrived at the final amount.
Material and Labor Breakdowns
When applicable, separating material and labor costs can provide additional clarity. Clients appreciate transparency, especially on large jobs where materials might represent a significant portion of the cost.
For example:
- Labor: 12 hours @ $50/hour = $600
- Materials: Paint, brushes, tape = $150
- Total: $750
You can include these as part of your line items or as a section at the end of the service descriptions.
Tax Requirements and Legal Considerations
If your local or state laws require that painting services be taxed, clearly indicate the tax amount on your invoice. List the percentage rate, apply it to the taxable subtotal, and show the resulting amount.
For example:
- Subtotal: $1,200
- Tax (7.5%): $90
- Total Due: $1,290
Always ensure your tax calculations are correct and up to date. Errors in tax billing can lead to legal complications or distrust from your clients.
Including Terms and Conditions
Add a dedicated section for your payment terms and conditions. This section should reinforce your policies regarding payment timelines, late fees, discounts, and methods accepted.
Example terms might include:
- Payment is due within 15 days of invoice date
- A late fee of $25 will be applied after 30 days
- A 5% discount is available for payments made within 5 days
- Accepted payment methods: Bank transfer, check, or cash
Be consistent with the terms you use across all invoices and communications. Repetition reinforces expectations and builds professionalism.
Optional: Deposits and Progress Billing
For larger projects or extended timelines, consider including sections for deposits or partial billing milestones. A standard approach might involve:
- 30% upfront deposit
- 40% midway upon completion of initial stages
- 30% upon final completion
Structure these as separate line items, clearly labeled by phase or date. Progress billing improves cash flow and reduces financial risk, especially for high-budget or multi-phase projects.
Adding a Signature Field
While not always mandatory, a space for the customer’s signature can serve as added protection. It confirms that the client acknowledges the work completed and agrees to the charges listed. This can be helpful if a dispute arises later on.
Leave space at the bottom for:
- Client name (printed)
- Signature
- Date
You can also sign the invoice yourself to indicate that it has been reviewed and finalized.
Clear Payment Instructions
Reiterate your payment methods in a section near the bottom. Provide all the information a client would need to pay you promptly:
- Name of recipient or business
- Bank account details if using direct deposit
- PayPal or online transfer instructions
- Mailing address for checks
Don’t assume your client knows how you prefer to be paid. Provide clear, step-by-step instructions if necessary.
A Professional Message or Note
Adding a short, professional message to your invoice makes your communication more human. A simple note like “Thank you for your trust in our painting services” or “We hope you enjoy your newly painted space” adds warmth.
This subtle addition can build goodwill and enhance your reputation for professionalism and care.
Design and Readability Best Practices
Beyond content, the design of your invoice impacts how clients perceive your professionalism. Keep these tips in mind:
- Use a clean layout with sufficient white space
- Choose a professional, easy-to-read font
- Align content neatly into sections and columns
- Avoid overuse of color, but use consistent branding elements
A visually organized invoice is easier to read and less likely to be questioned or disputed. Simplicity and clarity are key.
Choosing the Right Format
Most painters today send invoices digitally as PDFs. This format preserves your layout and is compatible across devices. However, always keep a backup version in an editable format (like Word or Excel) in case changes are needed.
Sending invoices through email is standard, but confirm with the client beforehand. Some may prefer printed copies, especially for insurance or legal purposes.
Include the invoice in the body of your email or as an attachment, and use a professional subject line like “Invoice for Painting Services – Johnson Residence.” This improves visibility and ensures quicker response times.
Timing Your Invoice Delivery
Send your invoice promptly after completing the job. Ideally, this should be the same day or within 24 hours. Timeliness signals professionalism and increases the chance of getting paid on time.
If you are billing for progress milestones, schedule those invoices in advance and confirm receipt with the client at each stage.
Following Up Without Being Pushy
If payment hasn’t arrived by the due date, send a polite follow-up message. You can write something like:
“Just a friendly reminder that payment for the completed painting services is due. Please let us know if you have any questions or require additional details.”
Be courteous and understanding. Sometimes delays are unintentional. However, regular communication shows that you take billing seriously. If further follow-ups are needed, space them a week apart and document each attempt.
Filing and Recordkeeping
Keep copies of all invoices you send, along with records of payment and correspondence. Whether you use cloud storage, spreadsheets, or a dedicated business tool, maintain an organized system.
File your invoices by client, project, or date. This simplifies bookkeeping, especially during tax season or when applying for business financing. Also, track unpaid invoices separately. Set calendar reminders for follow-ups and monitor which clients consistently delay payments. Over time, this data helps refine your client screening process.
Making Use of Invoice Templates
Using a reusable invoice template speeds up the billing process and reduces the chance of errors. Once you create a format that works well, you can copy and reuse it for each new project.
Customize templates to include space for all the components covered here. Keep it flexible enough to accommodate different job types and payment structures. Update your template occasionally to reflect changes in pricing, tax laws, or business branding. This ensures consistency and professionalism across all client communications.
Bigger Picture
Creating a painting invoice is more than a financial transaction—it’s a communication tool that reflects the quality and integrity of your service. Every detail, from how the information is organized to how it’s presented, impacts how your business is perceived.
Scaling Your Painting Business with Advanced Invoicing Techniques
As your painting business grows, managing invoices becomes more complex. We focus on advanced strategies for invoicing, especially when working with commercial clients, larger teams, or recurring contracts. These approaches help reduce administrative burdens, improve cash flow, and maintain professionalism at every stage.
Establishing a Billing System for Larger Projects
When dealing with large-scale painting jobs, whether commercial or residential, a well-defined billing structure is crucial. These jobs often span multiple weeks or months, involve subcontractors, and require significant upfront investments.
Instead of waiting until the end of the project to bill the full amount, adopt a phased billing system. This can include:
- Initial deposit upon contract signing
- Progress payments at defined milestones
- Final balance due upon completion
Each invoice should reference the original agreement and include details about what has been completed and what portion of the payment it represents. Transparency ensures that clients understand the value delivered at each stage.
Customizing Invoices for Commercial Clients
Commercial clients often have more formalized expectations and internal billing procedures. To meet these expectations:
- Use their purchase order numbers when invoicing
- Include detailed job descriptions that align with the initial proposal or contract
- Break down labor, materials, and overhead for accounting purposes
Always ask your commercial client if they have invoicing requirements or templates. Aligning your invoices with their systems minimizes approval delays and fosters long-term professional relationships.
Recurring Painting Contracts and Scheduled Invoices
Recurring painting work, such as ongoing maintenance for property managers or institutions, requires a consistent invoicing schedule. This can be weekly, bi-weekly, or monthly.
In these cases:
- Reference the billing period in the invoice header
- Itemize all completed services within that timeframe
- Reiterate the terms agreed upon in the service contract
Scheduled invoicing helps ensure predictable cash flow and simplifies planning for both you and your clients.
Handling Change Orders and Scope Adjustments
Change is inevitable in many painting projects. Whether it’s a client requesting additional rooms or unexpected surface damage requiring more preparation, change orders must be reflected in your invoicing.
Use a dedicated section in the invoice titled “Change Orders” or “Additional Work.” Include:
- A brief description of the change
- Date the change was approved
- Cost breakdown
Refer back to the original contract when applicable, and ensure the client signs off on these changes before adding them to the invoice. This helps avoid misunderstandings and delayed payments.
Managing Multiple Invoices for One Client
Some clients may have several active projects at once, especially in the case of property developers or facility managers. To keep records organized:
- Assign separate invoice numbers for each project
- Include a job reference code unique to each location or task
- Maintain clear communication and summaries in emails or cover letters accompanying invoices
Keeping these invoices distinct allows both you and the client to track and reconcile charges more easily.
Implementing Early Payment Incentives
To encourage prompt payment, offer small discounts for early settlement. A standard structure is:
- 2% discount if paid within 10 days
- Full payment due in 30 days without discount
These terms can be clearly noted in the payment section of your invoice. Be sure to specify how the discount should be applied and the exact deadline for eligibility. This tactic can significantly boost cash flow, especially for smaller operations.
Dealing with Late Payments
Despite your best efforts, some invoices may go unpaid past their due dates. Handling these situations professionally is essential for maintaining client relationships while protecting your revenue.
Follow this process:
- Send a polite reminder 1–3 days after the due date.
- Follow up with a second reminder after one week.
- Add a late fee if specified in your contract.
- After several failed attempts, consider a collection agency or legal consultation.
Keep communication professional and consistent. Late payment policies should be included in your original agreement and visible on your invoices.
Automating Invoice Tracking and Follow-ups
As your client base grows, manually tracking outstanding invoices becomes inefficient. Use an invoicing system that allows you to:
- Set reminders for due dates
- Automatically send follow-up emails
- Generate reports showing paid and unpaid invoices
Automation saves time and reduces the risk of letting unpaid invoices slip through the cracks. It also provides a better customer experience by maintaining regular, timely communication.
Keeping Detailed Records for Tax and Legal Purposes
Every invoice you issue should be stored in a secure, organized system. This includes:
- Invoice copies
- Proof of delivery (email confirmations or signatures)
- Payment receipts
- Communications related to each job
Good recordkeeping is not just for audits or taxes—it also protects your business during disputes. Maintain both digital and backup copies, and categorize files by client and project type for quick retrieval.
Creating a Standardized Template for Team Use
If your business involves a team of painters or administrative staff, standardizing your invoicing format is key. Create a consistent template that:
- Includes your logo and brand colors
- Follows a uniform layout
- Provides space for all required information
Train your staff on how to fill out and send invoices accurately. Consistency builds your reputation and reduces the risk of errors or client confusion.
Building an Invoice Approval Workflow
Before sending invoices to clients, set up an internal review process. Especially for large projects, invoices may need to be checked by project managers or accountants.
An effective approval process includes:
- Verifying work completed against the original estimate
- Checking for any change orders or extras
- Confirming client contact and billing information
- Reviewing tax calculations and totals
This final layer of quality control minimizes mistakes that could lead to delays or disputes.
Communicating Invoicing Policies Upfront
To reduce payment issues, communicate your invoicing policies clearly during the proposal or contract stage. Outline your terms on your service agreement and reiterate them verbally when starting work.
Discuss:
- Payment schedule
- Accepted methods of payment
- Early payment discounts
- Late fees
Clear communication prevents confusion and sets expectations from the beginning of the business relationship.
Evaluating Client Payment Behavior
Over time, you’ll notice patterns in how clients handle payments. Use this information to:
- Prioritize follow-ups for slower-paying clients
- Offer more flexible terms to trustworthy clients
- Adjust your pricing to reflect administrative effort
Maintain a client history with notes about payment reliability, average turnaround time, and any issues experienced. This helps with future job planning and risk management.
Creating Summaries for Long-Term Projects
For long-term or recurring contracts, periodic invoice summaries can be helpful for clients and your own accounting. These summaries provide a snapshot of:
- Total amount billed to date
- Payments received
- Balance due
Include this as a separate document or an additional page with your monthly invoice. It adds clarity and reduces the number of inquiries from clients.
Dealing with Disputed Charges
Sometimes, a client may question the charges on an invoice. When this occurs:
- Stay calm and review the invoice together
- Provide documentation, such as signed work orders or photos
- Offer a breakdown of the specific costs in question
Always aim to resolve the issue collaboratively. If the dispute can’t be resolved amicably, refer to the signed agreement or seek third-party mediation if necessary.
Integrating Invoicing with Other Business Systems
To streamline operations, integrate your invoicing process with other areas of your business, such as:
- Job scheduling
- Inventory management
- Accounting software
This reduces manual entry, decreases the chance of errors, and helps you maintain up-to-date financial reports. Integration becomes especially important as your business scales and requires greater efficiency.
Incorporating Feedback from Clients
Your invoicing process is a part of your customer experience. Occasionally ask clients for feedback on your invoices. Useful questions include:
- Was the invoice easy to understand?
- Did the payment process go smoothly?
- Were all charges explained clearly?
Use this feedback to improve your layout, descriptions, or payment options. This extra step can enhance your professional image and increase client satisfaction.
Preparing for Seasonal Peaks
Many painting businesses experience seasonal demand spikes. During these periods, administrative tasks like invoicing can become overwhelming. Prepare by:
- Pre-loading template information for expected jobs
- Assigning invoicing tasks to specific team members
- Creating schedules for sending and following up on invoices
Preparation reduces errors and delays when your workload increases, keeping cash flow consistent.
Expanding Your Services and Adjusting Invoice Models
As your business grows, you may offer additional services like wallpaper installation, pressure washing, or drywall repair. Adjust your invoicing models to accommodate these changes:
- Update line items to reflect new services
- Create bundle packages with discounted rates
- Define new labor and material cost structures
Your invoice is a reflection of the services you provide. Make sure it evolves alongside your business to ensure accuracy and relevance.
Tracking Performance Metrics
Finally, use your invoicing data to track key performance indicators for your business:
- Average time to payment
- Percentage of late invoices
- Revenue by service type
- Most profitable clients
Review these metrics monthly or quarterly to inform strategic decisions. They provide insight into operational efficiency, client value, and areas needing improvement.
The ability to scale your painting business often depends on the strength of your back-office systems. A smart invoicing strategy helps maintain organization, improve professionalism, and support sustainable growth. Invoices are not just about collecting money—they’re about building long-term client relationships and creating a structure that helps your business thrive.
Conclusion
Invoicing is more than just a financial formality—it’s a reflection of your painting business’s professionalism, reliability, and organization. From the moment a job is completed, a clear, detailed invoice builds trust with clients and sets the stage for timely payments. Whether you’re a solo painter handling small residential jobs or managing a growing team working on large commercial projects, mastering the invoicing process is essential.
We covered the fundamentals of writing a professional painting invoice. This includes key components such as accurate client and project information, service descriptions, taxes, payment terms, and the importance of prompt delivery. These foundational elements ensure clarity and prevent misunderstandings between you and your clients.
We explored how to elevate the professionalism of your invoices by customizing them for specific projects, using clean formatting, incorporating detailed cost breakdowns, and using tools that support consistent documentation. A well-designed invoice not only speeds up payment but also reinforces your brand’s credibility.
We addressed more advanced invoicing strategies, especially useful for businesses managing multiple projects, recurring contracts, or commercial clients. Topics like phased billing, handling change orders, automating follow-ups, and tracking payment performance provide valuable guidance for scaling your business effectively.
By adopting a systematic, thoughtful approach to invoicing, you not only improve your business operations but also enhance your client relationships. Clear invoices reduce confusion, streamline cash flow, and help you present your services in a way that matches the quality of your craftsmanship. As your painting business evolves, a professional invoicing system will continue to be one of the most important tools supporting your growth.