Why Proper Estimates Are Crucial for Small Businesses
Accurate estimates have multiple benefits, both for the business and the client:
- They reduce misunderstandings by clearly defining the scope, cost, and timeline.
- They help secure the project by demonstrating competence and transparency.
- They provide a baseline for comparing actual vs. projected performance.
- They improve cash flow by clarifying what can be billed and when.
- They enhance client satisfaction by avoiding overpromising or unexpected charges.
Poorly prepared estimates, on the other hand, can result in disputes, scope creep, delayed payments, and damage to your reputation. As a result, mastering the process of how to make an estimate is essential to long‑term business success.
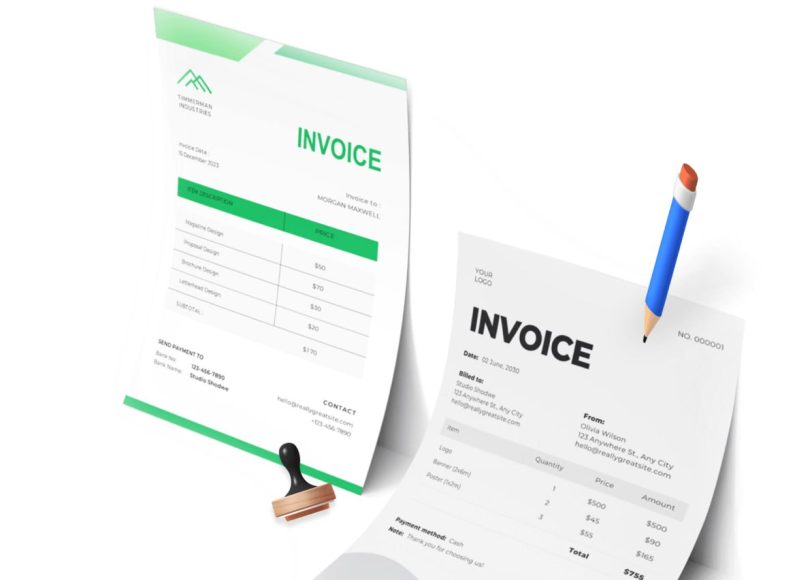
Key Components of a Well‑Written Estimate
A quality estimate should include the following elements to ensure clarity and comprehensiveness:
- Your business name, address, and contact information
- Client name, address, and contact details
- Estimate the number and date.
- A clear description of the project scope and deliverables
- Itemized breakdown of labor, materials, supplies, and subcontracted work
- Estimated quantities and unit prices or rates
- Projected timeline, including start and end dates
- Payment terms, deposit requirements, and any schedule of invoices
- Terms and conditions, such as penalties, change order policies, or guarantees
- Signature or acknowledgment line
Using consistent formatting supports easy understanding, avoids omissions, and helps clients compare estimates effectively.
Step 1: Gather Client Requirements
The foundation of an accurate estimate lies in understanding exactly what the client needs. Begin by asking detailed questions about project objectives, deliverables, quality expectations, and any constraints. Visit the job site if relevant to assess conditions firsthand. Request reference materials, design drafts, or past examples to align your assumptions.
Continue this exploratory conversation until both parties have clarity on what the estimate will cover. Miscommunications at this stage can cause costly revisions down the line. Asking the right questions also demonstrates your expertise, which strengthens client confidence.
Step 2: Analyze Scope and Build the Work Breakdown
Break your project into manageable tasks or phases. For example, a renovation might include site preparation, material procurement, installation, and cleanup. Each task should be defined clearly, with its own labor and material estimates.
A thorough breakdown prevents hidden work from appearing later and helps clients understand what they are paying for. It also gives you better control over budgeting and resource allocation. Develop a structure like:
- Task A: Description – estimated hours × rate = subtotal
- Task B: Description – estimated hours × rate = subtotal
- Material list: item × quantity × unit price
Maintaining this level of detail allows for easier updates if the client requests a change in scope later.
Step 3: Estimate Labor and Material Costs
Once your tasks are defined, calculate labor and material expenses for each.
Labor Costs
Estimate the number of hours needed and multiply by your hourly rate. If multiple workers or specialists will be involved, factor in their specific rates. Include setup or travel time and be realistic about productivity and potential delays.
Material and Supplies
List all materials needed with estimated quantities and prices. Consider current market rates and include a contingency factor in case of price fluctuations or waste. For subcontracted work or rented equipment, request written quotes so your estimate remains competitive and accurate.
Additional Costs
Some projects may require permits, inspections, disposal fees, or other external expenses. Include these in your materials section or create a separate line item to ensure they’re not overlooked.
Step 4: Define Project Timeline Clearly
Clients often want to know when work will begin and finish. Estimate both the total duration and key milestones, taking into account lead times, dependencies, and working hours.
Lay out dates in a simple format:
- Estimated start date: Month Day, Year
- Milestone 1: [Description] – completion date
- Estimated completion date: Month Day, Year
Providing realistic timelines builds client confidence and sets shared expectations for delivery.
Step 5: Write Payment Terms and Deposit Requirements
Include a payment section that defines:
- Deposit needed to begin work (e.g., 30% upon approval)
- Billing schedule (e.g., milestone payments, weekly invoicing, or one-time payment)
- Accepted payment methods
- Late payment charges or interest rates
- Retainer terms or cancellation policies
Clear agreements on payments ensure you manage cash flow and reduce the risk of late or contested invoices.
Step 6: Add Terms and Conditions
A concise terms section helps protect your business. Define the process for managing scope changes, handling site delays, or supplying warranty information. Examples include:
- Changes require written approval and an updated estimate.
- Delays caused by the client add extra time/cost.
- Materials left on-site are at the owner’s risk.
- Incomplete accounts may incur finance charges.
Setting expectations early avoids confusion and strengthens your professional credibility.
Step 7: Review and Revise the Estimate
Before sending, double-check all figures for accuracy. Confirm quantities, rates, calculations, tax implications, and timeline details. Ensure descriptions align with client expectations. It may help to have a colleague or third party review the estimate to catch errors you might miss.
Using a standard template streamlines this process and ensures each estimate meets your quality standards.
Step 8: Present the Estimate Professionally
Send the estimate as a PDF named clearly, for example “Estimate_YourCompany_ClientName_Date.pdf.” Include a polite cover email that references the estimate number and highlights key points like estimated cost and timeline. Invite questions and offer to walk the client through the estimate if desired.
A thoughtful presentation reflects professionalism and attention to detail, improving your chances of winning the job.
What to Do After Sending
After emailing the estimate, follow up within a few days to ensure the client received and understood it. Offer to clarify any questions and ask if they need revisions. If the client requests adjustments, update your estimate accordingly and send a revised version with a new estimate number and date.
Understanding the Type of Estimate to Use
Before preparing an estimate, it’s essential to determine what type suits the project and client. Each serves a different purpose and carries a different level of commitment.
Ballpark Estimate
A ballpark estimate provides a rough cost range to help the client determine whether the service fits their budget. It’s used early in the discussion and does not contain detailed line items. These are often shared verbally or through a brief email.
Ballpark estimates are appropriate when the scope is unclear or when the client needs a general cost idea before committing to further discussions.
Detailed Estimate
This includes a full itemization of labor, materials, quantities, and timeline. It is used when the project scope is defined, and the client is seriously considering the proposal.
Detailed estimates serve as the basis for formal agreements and give both parties a common reference point for delivery and billing.
Not-to-Exceed Estimate
Also known as a maximum price estimate, this version sets a cap that will not be exceeded under normal conditions. This type protects the client from unexpected cost increases while still allowing flexibility in execution.
These are useful for projects where some uncertainties exist, but the service provider wants to instill client confidence.
Time and Materials Estimate
This format outlines hourly labor rates and material markups but does not define a fixed total. It’s ideal for projects with uncertain duration or evolving scope.
Time and materials estimates are common in maintenance, repair, consulting, and freelance work.
Tailoring Estimates by Industry
Each industry has its pricing structures, client expectations, and common cost variables. Tailoring your estimate to match industry norms and project specifics enhances your credibility.
Construction and Home Services
In construction, clients expect detailed cost breakdowns for materials, labor, permits, and equipment. Estimates should also include a contingency budget for unforeseen issues such as structural surprises or weather delays.
- Provide measurements, material brands, and quantities.
- Include estimated working days or phases.
- Add a section for subcontractor work, if applicable.
- Clearly define whether cleanup, inspections, or disposal are included.
Graphic Design and Creative Services
Estimates for design work must address both tangible deliverables (logos, websites, brochures) and intangible elements such as concept development or revisions.
- Break down pricing by project stages: concept, mockups, final delivery.
- Clarify the number of revisions included and the cost of extras.
- Specify usage rights, format types, and delivery methods.
IT Services and Software Development
In tech services, clients often want to know how long each development phase will take and what support will be provided after delivery.
- Include task-based hourly rates for coding, testing, and deployment.
- Describe deliverables with clear technical language.
- Indicate software licensing fees, hosting costs, or third-party integrations.
- Offer maintenance or post-launch support options.
Consulting and Professional Services
Professional services such as financial planning, business coaching, or legal work typically use time-based pricing.
- Break estimates into hourly or daily billing options.
- Include descriptions of services rendered during the engagement.
- Offer project-based pricing for defined deliverables (reports, audits).
- Define retainer fees or minimum commitment periods.
Event Planning and Production
Estimates for events must include vendor costs, rentals, staffing, and setup/teardown labor.
- Create separate categories for logistics, decor, entertainment, and hospitality.
- Mention lead times and booking deposits required.
- Add disclaimers for price changes in third-party services.
Accounting for Markups and Discounts
It’s important to be transparent and consistent when applying markups or offering discounts. These should be shown clearly in the estimate so the client can understand the structure.
Material Markups
When you procure materials or supplies, it is common to apply a markup to cover sourcing time and handling. Specify the markup as a percentage or build it into the item price while noting it in the description.
Volume Discounts
For repeat or bulk clients, consider offering reduced rates as a loyalty incentive. Show this as a line item, such as “10% discount for contract exceeding $5,000,” to emphasize the value you’re offering.
Promotional Offers
If you’re offering time-limited deals or first-time client promotions, highlight this in the payment section. Indicate the expiration date and the regular price so the client sees the value.
Adjusting Estimates Based on Client Type
Not all clients require the same level of detail. Adjusting your estimates for individuals, corporate clients, or agencies helps you maintain efficiency while still communicating effectively.
Individual Clients
When working with homeowners or individual clients, use simpler language and avoid excessive technical jargon. Add context for each item to help them understand what they’re paying for.
Business Clients
For commercial clients, especially in procurement or operations roles, a more formal and structured estimate is expected. Use line-item formats, standardized categories, and add your business registration or tax identification numbers.
Agencies or Project Managers
Agencies appreciate modular estimates where they can repackage or resell your services. Structure your estimate into separate service blocks and include optional add-ons or variants.
Using Estimate Templates for Efficiency
Templates save time and ensure consistency. Once you’ve defined formats for your industry or common project types, create reusable templates that include placeholders for:
- Client name and address
- Project description
- Line items with standard rates
- Tax and discount formulas
- Payment terms
Update these templates regularly to reflect pricing changes, policy updates, or feedback from past projects.
Setting Pricing Strategies for Estimates
Pricing isn’t just about covering costs—it’s about reflecting value and positioning your brand. The estimate is where pricing and perception meet.
Cost-Plus Pricing
This involves calculating all your costs—labor, materials, overhead—and adding a margin for profit. This method ensures you don’t undercharge, but might miss premium pricing opportunities.
Market-Based Pricing
Here, you base your prices on what similar providers charge. This is useful for competitive industries but may compress your margins if you’re trying to stand out through service quality.
Value-Based Pricing
In this model, prices reflect the benefit delivered to the client rather than your internal costs. For example, if a solution saves a client $50,000 annually, a $10,000 estimate may be seen as a bargain.
Explaining Pricing Without Undervaluing Your Work
One common concern among small business owners is how to justify their pricing, especially when facing budget-conscious clients. Your estimate can serve as a subtle sales tool by framing the value:
- Use descriptive language that highlights outcomes, not just tasks.
- Include a note that compares your work’s durability, customization, or ROI against cheaper alternatives.
- List optional upgrades or maintenance to emphasize long-term thinking.
Avoid simply lowering your price to close the deal. Instead, adjust the scope or deliverables to meet the client’s budget while maintaining fair compensation for your effort.
Keeping Revisions Manageable
Clients may request changes to an estimate. To handle this professionally:
- Number your estimates clearly (e.g., Estimate #1023, Rev. 2).
- Highlight revised sections so clients can compare.
- Keep a changelog if working on long or complex projects.
Set a limit on free revisions in your terms or charge a nominal fee after the second revision to protect your time.
Protecting Your Business With Disclaimers
Estimates should include a brief disclaimer explaining that actual costs may vary due to uncontrollable factors. This prepares the client for minor changes while reducing disputes.
Example clause:
“Estimate based on current market prices. Final charges may vary by up to 10% due to material cost fluctuations, site conditions, or scope changes.”
Adding a clause like this does not weaken your professionalism; it shows that you anticipate real-world challenges and plan accordingly.
Sending Your Estimate the Right Way
After preparing your estimate, it’s important to present it in a format and tone that reflects professionalism. Sending estimates correctly improves your chances of receiving timely responses.
Choose the Correct File Format
Always send estimates in a secure and non-editable format. PDFs are preferred because they preserve formatting across devices and prevent accidental edits. Name the file using the client name, project name, and date to make it easy to identify.
Write a Thoughtful Cover Message
Accompany your estimate with a brief, courteous message. Summarize the project scope and highlight the total estimated cost and timeline. Reassure the client that you’re available to discuss questions or revisions.
Deliver to the Right Contact
Send the estimate to the decision-maker. If you’re dealing with a company, ensure you’re addressing the person who has the authority to approve the project. Include any additional stakeholders in CC to avoid communication gaps.
Following Up Without Being Pushy
After submitting your estimate, silence from the client is common. It’s important to follow up without being intrusive.
Recommended Follow-Up Timeline
- First follow-up: 2–3 business days after sending the estimate
- Second follow-up: 5–7 days after the first follow-up, if there is no reply
- Final follow-up: 10–14 days later, with a note asking if the client is still considering the proposal
Keep messages brief, polite, and focused on offering help. Avoid using high-pressure tactics.
Sample Follow-Up Message
Hi [Client Name],
I hope you’re doing well. I just wanted to check in to see if you had a chance to review the estimate I sent on [Date] for [Project Name]. I’d be happy to go over any questions or discuss adjustments based on your needs.
Looking forward to hearing your thoughts.
Best regards,
[Your Name]
Handling Revisions and Negotiations
Not all estimates will be accepted as-is. Clients may request changes to align with their budget or timeline.
Be Open to Collaboration
View revision requests as an opportunity to collaborate, not as a rejection. Discuss what elements of the estimate can be adjusted without compromising your standards.
Update Estimate Versions Clearly
Always revise the original estimate file instead of sending a completely new document. Change the version number or revision date in the header so it’s easy to reference. Use a consistent naming structure like Estimate_1032_Rev2.pdf.
Track Requested Changes
Keep notes on what was changed and why. This helps avoid confusion if the client revisits earlier versions or if you need to explain pricing during invoicing.
Converting Estimates into Agreements or Invoices
Once a client accepts an estimate, the next step is to formalize the agreement and prepare for project execution. Converting your estimate into a working document avoids duplicate work.
Get Written Approval
Before beginning work, request a formal acceptance. This can be a signed copy of the estimate, an email confirmation, or a digital approval through your invoicing system.
Generate a Contract If Needed
For larger projects, it’s good practice to convert the estimate into a simple contract. This includes:
- A restatement of the scope and pricing
- Start and end dates
- Payment milestones
- Terms for termination, disputes, or delays
Use the accepted estimate as the foundation for the contract language.
Convert to Invoice for Deposit
If your estimate includes a deposit requirement, convert it to an invoice immediately after approval. Include the deposit due date and a reference to the original estimate number to maintain a clear paper trail.
Organizing and Tracking Your Estimates
Efficient estimate tracking allows you to manage leads, forecast revenue, and follow up with clients more effectively.
Use a Centralized System
Track all your estimates in a centralized log or software that includes:
- Estimate number
- Client name
- Project description
- Date sent
- Status (sent, accepted, declined, pending)
- Follow-up notes
This helps you identify trends and maintain timely communication with prospects.
Set Up Status Alerts or Reminders
Use calendar reminders or digital tools to prompt follow-ups based on each estimate’s status. This ensures no potential job falls through the cracks due to a missed follow-up.
Categorize by Outcome
Mark each estimate as accepted, declined, or lost to another vendor. Over time, this gives you insight into which types of estimates convert best and which clients tend to decline.
Evaluating Your Estimate Success Rate
Tracking and analyzing estimated outcomes over time provides valuable business intelligence.
Calculate Your Conversion Rate
Estimate conversion rate = (Number of accepted estimates / Total estimates sent) × 100
This percentage gives you an idea of how effective your estimating and proposal process is.
Review Declined Estimates
When an estimate is declined, try to find out why. If the client chose a lower bid, you may need to reevaluate your pricing strategy or how you present your value. If timing was the issue, it could point to a need for better scheduling.
Track Average Approval Time
Knowing how long it typically takes for your estimates to be approved helps with scheduling and cash flow planning. If you notice delays, consider revising your delivery process or follow-up messaging.
Managing Estimate Revisions Internally
Revisions aren’t just for clients—they can also be based on internal changes. Market rates may shift, timelines might shorten, or your team’s availability may affect pricing.
Revisit Old Estimates
If a project stalls and the client returns months later, revisit the estimate to confirm its accuracy. Material costs, staffing, or taxes may have changed. Add a note clarifying the date the pricing was valid through.
Protect Yourself with Expiry Dates
Add a line that states the estimate is valid for a certain number of days—commonly 15 to 30. This creates urgency and avoids the risk of pricing disputes.
Example:
This estimate is valid through [Date]. After this date, rates may be subject to revision.
Common Mistakes to Avoid in Estimate Management
Ignoring Follow-Ups
Clients are often busy. Following up is part of your job. Set reminders and treat follow-ups as a routine business function.
Sending Estimates Without Confirmation
Don’t begin work until the client has explicitly approved the estimate. A misunderstanding at this stage can lead to unpaid work or disputes.
Making Verbal Changes
All revisions should be documented. Even if discussed on the phone, follow up with an updated written estimate or email confirmation.
Overcomplicating Revisions
Too many estimated versions can confuse the client. Keep versions organized, avoid unnecessary complexity, and indicate what changed.
Organizing Past Estimates for Reporting
Tracking your estimates over time helps with forecasting, planning, and reporting.
Analyze Seasonal Patterns
Identify which months generate the most estimate requests. Use this information for marketing, hiring, or inventory planning.
Forecast Revenue
Accepted estimates can be used to project revenue for future months. Add them to your forecasting reports to gauge how busy upcoming periods might be.
Improve Pricing Models
Reviewing past estimates and their outcomes allows you to refine your pricing model. You may discover patterns such as clients preferring bundled pricing over itemized lists.
Why Streamlining Estimates Matters
As your business grows, creating and managing estimates manually becomes time-consuming and error-prone. Sending inconsistent or delayed estimates can lead to lost clients and missed opportunities. By systemizing your process, you not only save time but also increase your credibility.
Key benefits of streamlining include:
- Faster turnaround for client requests
- Consistent branding and formatting
- Fewer calculation or formatting errors
- Better tracking of estimated status and revisions
- Easy access to templates and client history
A well-organized estimate process allows you to focus more on your services and less on administrative tasks.
Essential Features to Look for in Estimating Tools
When evaluating tools to manage estimates, look for features that support flexibility, accuracy, and collaboration. The right tool should simplify rather than complicate your workflow.
Customizable Templates
Reusable templates are essential. They should allow you to:
- Pre-fill your business details and branding
- Structure line items, tax fields, and totals
- Include terms, conditions, and payment details..
- Easily swap out project-specific information.
Templates ensure consistency and save time, especially when you serve repeat clients or deliver similar services.
Client Contact Management
An effective estimating system should allow you to store client details, link them to estimates, and track communication. Look for features like:
- Searchable client databases
- Contact information is stored within the estimate files.
- Interaction history for follow-ups
This makes client outreach and follow-up smoother, especially for long-term or recurring projects.
Real-Time Collaboration or Sharing
Some tools allow sharing estimates via client portals or secure links. These options eliminate the need to send attachments and allow clients to:
- View estimates online
- Request revisions or approve with one click
- Comment directly on line items or terms.
Sharing estimates this way also provides visibility into when the client viewed the file.
Revision Tracking
Revising estimates is a common part of the process. A good system should let you:
- Clone estimates for easy modification
- Keep a version history of changes.
- Add notes about what was updated and why
This helps prevent miscommunication and ensures a paper trail for all adjustments.
Integration with Invoicing or Project Management
If your estimate system connects with other tools you use—such as invoicing, scheduling, or task management—it creates a seamless workflow. You can:
- Convert approved estimates into invoices
- Track time against estimated hours
- Monitor project progress from estimate to delivery.
Integrated tools reduce data entry and improve accuracy across your operations.
Steps to Automate Your Estimate Process
Automation doesn’t require complicated systems. Even simple steps can significantly improve efficiency.
Step 1: Build a Library of Estimate Templates
Create multiple templates based on common project types, pricing structures, or industries you serve. This allows you to quickly start an estimate without repeating the setup.
Examples might include:
- Design project template
- Home repair service template
- Marketing campaign estimate template
Each template should include standard terms, tax rates, and frequently used services.
Step 2: Set Up Pricing Tables or Service Catalogs
Instead of entering line items from scratch each time, create a database of services with:
- Item name or description
- Hourly rate or unit cost
- Default quantities or time estimates
This ensures pricing consistency and lets you build estimates faster by selecting from a preloaded menu.
Step 3: Use Calculation Fields and Tax Formulas
Avoid manual math by setting up fields that automatically calculate subtotals, taxes, and totals. This reduces errors and helps you quickly modify quantities or rates during revisions.
If your region requires complex tax handling (e.g., sales tax or VAT), configure your tool to apply the correct rate based on the client’s location.
Step 4: Link Estimate Approval to Invoicing
Once a client approves an estimate, convert it into an invoice with a single click. This streamlines your billing process and ensures consistency in amounts and descriptions.
Make sure your invoice links back to the original estimate for easy client reference.
Step 5: Track Status with Simple Dashboards
Keep a real-time overview of all active estimates using a dashboard or tracking sheet. Key columns might include:
- Estimate number
- Client name
- Project name
- Date sent
- Status (pending, accepted, declined)
- Follow-up due
Use color-coding or filters to prioritize follow-ups and see which estimates are awaiting responses.
Organizing Your Digital Estimate Library
Over time, you’ll build a large number of estimates. A structured filing system saves time and reduces confusion.
Folder Structure Suggestions
Organize estimate files by:
- Year and month
- Client name
- Project type or number
Example:
Estimates/2025/ClientName_ProjectA_Estimate01.pdf
Maintain separate folders for approved, declined, and draft estimates so you can retrieve documents quickly when needed.
Naming Conventions
Standardize file names using a consistent format such as:
Estimate_ClientName_ProjectName_Date
This makes estimates easy to find via search or when referencing past projects during discussions.
Improving Response Times with Estimate Templates
When clients request a quick estimate, the faster you respond, the higher your chances of landing the job. Having templates on hand lets you generate professional-looking estimates in minutes.
Speed doesn’t mean sacrificing quality. With pre-approved language, pricing tables, and branding elements built in, you can ensure every estimate is accurate, consistent, and aligned with your business image.
Common Estimating Workflow Mistakes to Avoid
Relying Entirely on Manual Entry
Even the best spreadsheets are prone to human error. Automate wherever possible to reduce mistakes and save time.
Skipping Internal Reviews
Even if you’re confident in your numbers, reviewing your estimate for typos, incorrect pricing, or timeline conflicts can prevent misunderstandings.
Failing to Include Terms and Conditions
Clear terms help manage expectations. Don’t skip this section even for short projects.
Sending Unformatted Documents
Always send estimates in clean, professional layouts with clearly labeled sections. Avoid cluttered tables or inconsistent fonts.
Not Backing Up Estimate Files
Store your files securely, with cloud backups or external drives. Losing the estimate history can create confusion and reduce your credibility with repeat clients.
Building a Culture of Consistent Estimating
If you work with a team, ensure everyone follows the same process. This promotes clarity, improves accuracy, and gives clients a consistent experience.
Create internal guidelines that define:
- How estimates are created, reviewed, and approved
- What templates or pricing structures do I use
- Who is responsible for follow-ups and revisions
Schedule periodic reviews to assess your success rate, track estimated conversions, and refine your approach.
Preparing for Growth With Scalable Systems
As your business grows, your estimating process should be able to scale. Choose systems and workflows that:
- Handle more clients without slowing down
- Support different user roles and permissions.
- Offer mobile access for on-the-go estimating.
- Connect with your invoicing, CRM, or accounting platforms.
The more your estimating system supports your operations, the more you can focus on delivering excellent work instead of managing paperwork.
Conclusion:
Modern small businesses need estimating processes that are fast, repeatable, and reliable. By embracing digital tools, automating repetitive steps, and using clear templates, you can reduce errors, save time, and improve your win rate. The goal is not just to create an accurate estimate, but to deliver it efficiently and follow it through to conversion.