Step 1: Understand the Project Scope
The foundation of any accurate estimate begins with a deep understanding of the project’s scope. This means gathering detailed information about the client’s needs and the specifics of the job. Every photography project is unique, and knowing exactly what’s expected will prevent surprises and help you price accordingly.
Start by asking key questions:
- What type of event or shoot is it? Is it a wedding, corporate event, family portrait, commercial product shoot, or something else?
- Where will the shoot take place? Consider the location(s), accessibility, and any travel requirements.
- How long will the session last? Will it be a few hours or span multiple days?
- What are the client’s specific requests? For example, do they require drone photography, special lighting, or same-day delivery of images?
Understanding these factors is critical because each affects the time, effort, and resources required. For instance, a simple studio portrait session demands less preparation and post-processing compared to a multi-location wedding with numerous guests and complex lighting setups.
Similarly, commercial photography involving product styling and retouching generally requires more time than informal family portraits. The complexity and scale of the shoot will directly influence your pricing and time estimates.
Be sure to document all client requirements and clarify any ambiguous points. This step forms the basis of your estimate and sets expectations for both parties.
Step 2: Calculate Your Cost of Doing Business
Once you have a clear project scope, the next step is understanding your cost of doing business (CODB). This calculation is crucial to ensure your pricing covers all expenses while delivering a profit.
Start by listing your fixed costs—expenses that remain constant regardless of how many shoots you complete. These typically include:
- Camera and lighting equipment purchases and maintenance
- Editing software subscriptions
- Insurance for equipment and liability
- Website hosting and marketing expenses
- Studio rent (if applicable)
Next, identify variable costs that fluctuate based on the job. These can include:
- Travel expenses such as fuel, tolls, or flights
- Hiring additional photographers or assistants
- Renting props, studio space, or special equipment
- Printing or framing costs
- Extra editing hours depending on the shoot’s complexity
To find your baseline price, calculate your total annual expenses (fixed + variable) and divide them by the estimated number of shoots you plan to book each year. This gives you a minimum amount you must earn per job to break even.
Then, add your desired salary and business growth budget on top of this baseline. Remember to include a profit margin to keep your business sustainable and allow for unexpected expenses.
Failing to account for your full cost structure often leads to pricing that is too low, which may seem competitive but is unsustainable long-term. Pricing must reflect your total investment in equipment, time, and expertise.
Step 3: Determine Your Hourly or Flat Rate
After knowing your cost structure, you can decide on the pricing model for your services—hourly rates or flat rates.
Hourly rates are suited for projects where the amount of work varies or is unpredictable. Examples include corporate events, real estate shoots, or long sessions where the end time is uncertain. Charging by the hour ensures you are paid fairly for all your time, including shooting, travel, and editing.
Flat rates, on the other hand, work well when the deliverables and scope are well-defined. Weddings, portrait sessions, and commercial shoots often fall into this category. Clients appreciate flat rates because they provide cost certainty upfront, allowing them to budget confidently.
Choosing the right model depends on your niche, client preferences, and the nature of the job. Many photographers use a combination of both—charging hourly for some jobs and flat rates for others.
When setting your rates, research your local market and niche competitors. Understand the going rates for photographers with similar experience and skills in your area. This benchmarking helps you position yourself competitively while ensuring your rates cover your costs.
Keep in mind that newer photographers often start with lower rates to build their portfolio, while seasoned professionals with strong reputations can command premium prices.
Step 4: Factor in Post-Production Time
Photography is not just about the shoot day; post-production plays a significant role in delivering high-quality images. Editing, retouching, color correction, and final formatting can consume as much or more time than the shoot itself.
To create an accurate estimate, account for:
- Selecting and culling the best images from the shoot
- Basic editing, such as exposure adjustments and cropping
- Advanced retouching, including skin smoothing, background edits, and special effects
- Client revision rounds, where additional changes may be requested
- Preparing deliverables such as digital files, prints, or albums
The time required varies widely by project type. For example, wedding photographers might spend three hours editing for every hour spent shooting, while a simple headshot session may require much less.
Be sure to price prints and physical products separately from your service fees. Printing costs vary by size and quantity, and clients should understand these additional expenses upfront.
Including post-production in your pricing ensures you don’t undervalue your work or end up spending unpaid hours behind the scenes. It also helps set clear client expectations regarding turnaround times and deliverables.
Step 5: Analyze Market Rates and Competitor Pricing
One of the most critical elements in estimating photography jobs is understanding the broader market landscape. How much are other photographers in your niche and location charging? How do your skills, experience, and offerings compare? Pricing yourself in a vacuum can either undervalue your work or price you out of the market.
Here’s how to effectively analyze market rates:
Research Your Local Market
Start by investigating photographers who serve your area and specialize in similar work. Look for:
- Pricing on Websites: Many photographers publish their pricing tiers online. Review these to get a sense of typical rates for weddings, portraits, commercial shoots, and other services.
- Reviews and Testimonials: Notice the clientele and project types these photographers handle. Higher-end photographers with glowing testimonials may justify premium pricing.
- Social Media and Portfolios: Pay attention to the quality and style of their work. More polished portfolios and broader service offerings often command higher prices.
You can also join local photography groups, forums, or professional associations where pricing discussions sometimes occur. Networking with other professionals helps you gauge realistic price ranges and what clients expect to pay.
Understand Niche Variations
Photography niches differ dramatically in pricing structures. For example:
- Wedding photographers typically charge more due to the event’s complexity and emotional value.
- Corporate or commercial photographers often set higher rates because of business clients’ budgets and licensing considerations.
- Family or senior portraits generally command moderate pricing, reflecting shorter sessions and simpler editing.
Make sure to compare yourself against photographers with a similar niche, skill level, and geographic reach.
Adjust for Your Experience and Value
Market research isn’t about copying competitors; it’s about positioning your unique value. If you offer exceptional customer service, specialized equipment, or unique artistic styles, these justify a premium. Conversely, if you are newer, consider slightly lower rates initially but plan to raise prices as your portfolio and reputation grow.
Step 6: Leverage Estimation Tools and Software
Estimating photography jobs manually can become complex and time-consuming, especially as your business grows. Fortunately, several tools and software solutions exist to streamline and professionalize this process.
Why Use Estimation Software?
- Accuracy: Software helps ensure you don’t overlook key costs or time estimates.
- Speed: Automate calculations and quickly generate client-ready quotes.
- Consistency: Maintain uniform pricing and formatting across projects.
- Professionalism: Well-designed proposals look polished and reinforce trust.
Types of Tools to Consider
- Spreadsheets: Custom Excel or Google Sheets templates can track costs, hours, and pricing formulas. Spreadsheets offer flexibility but require manual updates.
- Photography Pricing Calculators: Several online calculators specifically designed for photographers help you input variables (hours, travel, editing time) and output suggested prices.
- Invoicing and Estimating Software: Platforms like HoneyBook, 17hats, or specialized photography business tools allow you to create and send detailed estimates, track client approvals, and manage payments in one place.
Some tools even integrate contracts and scheduling features, simplifying your entire client management workflow.
Building Your Estimation Template
If you prefer a DIY approach, build a detailed spreadsheet that includes:
- Project details (date, client, location)
- Estimated hours (shooting, travel, editing)
- Equipment or assistant fees
- Travel and miscellaneous expenses
- Hourly or flat rates
- Subtotals and total cost
- Taxes and payment terms
This method keeps you organized and speeds up repetitive quoting tasks.
Step 7: Communicate Your Estimate Clearly and Professionally
Once you’ve prepared your estimate, the next step is client communication. How you present your pricing can make a significant difference in client perception and acceptance.
Deliver a Detailed Breakdown
Clients appreciate transparency. Instead of a lump sum, present an itemized list covering:
- Shooting hours and rates
- Post-production time and fees
- Travel or location surcharges
- Additional services like prints, albums, or digital rights licensing
Explaining each element helps clients understand where their money goes and avoids surprises or pushback later.
Use Clear, Client-Friendly Language
Avoid jargon or overly technical terms that confuse non-photographers. Use simple, concise explanations emphasizing value:
- “Includes 4 hours of on-site photography with two photographers to cover all moments.”
- “Post-production includes color correction, retouching, and delivery of high-resolution digital files.”
- “Travel fee covers transportation to and from the venue, 50 miles away.”
Friendly, professional language shows respect and builds rapport.
Set Expectations Around Deliverables and Timelines
Make sure clients know what to expect regarding:
- Number of edited photos or final deliverables
- Delivery format (digital gallery, USB drive, prints)
- Turnaround time for proofs and final images
- Revision policies (e.g., how many rounds of edits included)
This clarity reduces misunderstandings and manages client expectations effectively.
Step 8: Include Terms and Conditions
An often overlooked but essential part of estimates is the inclusion of clear terms and conditions. This protects both you and your client by defining:
- Payment schedules (deposit required, balance due date)
- Cancellation and rescheduling policies
- Usage rights and licensing terms for images
- Liability disclaimers and backup plans
- Additional charges for overtime or unexpected changes
Including these upfront makes your business appear professional and reduces risk. Many photographers incorporate these terms into their estimate documents or attach them as a separate contract.
Step 9: Present the Estimate Professionally
How you deliver your estimate matters. It’s more than just a number—it’s your first formal business communication and an opportunity to impress.
Choose the Right Format
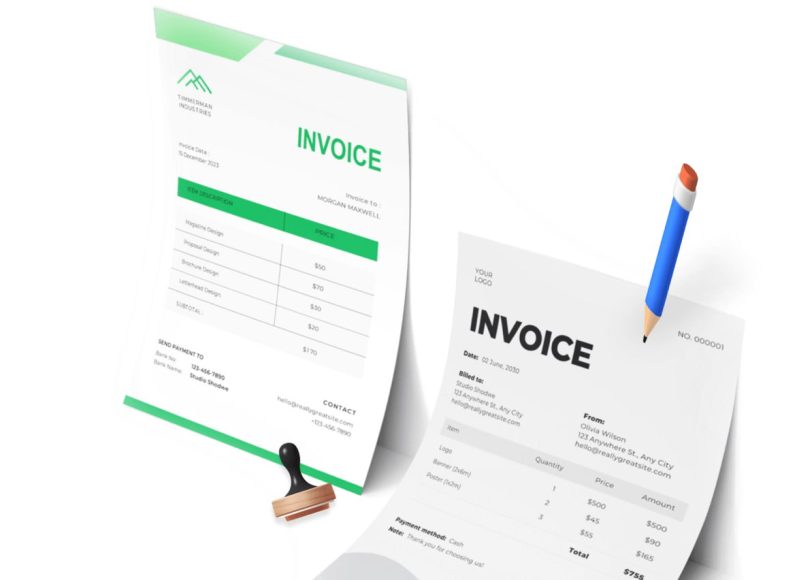
- PDF Document: Create a clean, branded PDF with your logo, contact info, client name, and job details.
- Email Message: Accompany the PDF with a warm, personalized email reiterating key points and inviting questions.
- Online Client Portals: If you use business software, send estimates via client portals where clients can view, approve, and sign electronically.
Avoid casual text messages or handwritten notes for serious estimates.
Follow Up Thoughtfully
Don’t assume silence means acceptance. After sending your estimate:
- Wait 2-3 days, then follow up politely to check if the client has questions.
- Be open to discussing adjustments if needed, but stand firm on your value.
- Use follow-ups as an opportunity to reinforce your professionalism and eagerness to work.
Step 10: Review and Refine Your Estimates Regularly
Your pricing and estimating process shouldn’t be static. As your skills improve, equipment costs change, or market conditions shift, revisit your pricing structure regularly.
Track Actual vs. Estimated Time and Costs
Keep records of how long shoots and editing take versus your original estimate. If you notice consistent underestimating or overestimating, adjust accordingly.
Gather Client Feedback
After projects, ask clients about their experience with your pricing and communication. Use this input to improve clarity and value perception.
Stay Informed on Market Trends
Photography trends and economic conditions evolve. Keep an eye on competitor pricing, inflation, and client expectations to stay competitive without undervaluing your services.
Step 11: The Importance of a Well-Crafted Photography Contract
A contract is the backbone of any professional photography job. It’s a legally binding document that clarifies the scope of work, protects your rights, and minimizes misunderstandings. Many photographers underestimate the value of a thorough contract, which can lead to disputes, delayed payments, or scope creep.
What to Include in Your Photography Contract
- Scope of Work: Clearly define what services you will provide, including shoot duration, locations, number of photographers, and deliverables (number of edited photos, albums, prints, etc.).
- Payment Terms: Detail the total cost, deposit amount, due dates for payments, and accepted payment methods. Specify late payment penalties if applicable.
- Cancellation and Rescheduling Policies: Define what happens if the client cancels or changes the date. Include timelines for refunds or fees.
- Copyright and Usage Rights: Specify who owns the copyright (usually the photographer) and what rights the client has (personal use, commercial use, etc.). Clarify if additional licensing fees apply for extended usage.
- Model Releases: If your work involves people, include provisions about consent for using images in your portfolio or marketing.
- Liability Limitations: Protect yourself from unforeseen circumstances such as equipment failure, accidents, or weather issues.
- Force Majeure Clause: Cover events beyond your control (natural disasters, emergencies) that could impact the shoot.
- Revisions and Edits: Set expectations about the number of retouching rounds included and charges for extra edits.
- Delivery Timeline: Commit to a realistic delivery schedule for proofs and final images.
- Dispute Resolution: Outline how conflicts will be handled, such as mediation or legal jurisdiction.
Why Contracts Matter
- Professionalism: Contracts show clients you take your business seriously and set a professional tone.
- Clear Expectations: They minimize misunderstandings and scope creep by outlining exactly what is included.
- Legal Protection: Contracts protect you from non-payment, liability claims, and unauthorized use of your work.
- Confidence: Knowing the legal boundaries allows you to focus on the creative side with peace of mind.
There are many templates available online tailored for photographers. It’s wise to consult a legal professional to customize your contract to your business and jurisdiction.
Step 12: Negotiation Strategies for Photography Jobs
Negotiating price and terms is a common but delicate part of working with clients. Handling negotiations with tact ensures you maintain your value while building positive relationships.
Prepare Before Negotiations
- Know your bottom line — the minimum price and terms you are willing to accept.
- Understand the client’s needs and budget as much as possible before discussing price.
- Identify non-monetary value you can offer (extra images, faster delivery) if you need to be flexible.
Effective Negotiation Techniques
- Listen Actively: Let clients explain their concerns or budget constraints. Understanding their position helps you tailor your response.
- Highlight Your Value: Emphasize your experience, quality, and what sets you apart. Explain why your pricing is justified.
- Offer Options: Present tiered packages or add-ons instead of dropping your price outright. For example, a basic package with fewer hours or photos versus a premium all-inclusive option.
- Stay Firm but Friendly: Don’t undersell yourself just to close the deal. If the budget is too low, it’s better to walk away politely than to undervalue your work.
- Use Deadlines: Sometimes, offering a limited-time discount or package can motivate quicker client decisions.
- Put It in Writing: Any agreed changes to price or scope should be documented in an updated estimate or contract addendum.
When to Say No
Not every potential client is a good fit. If the negotiation threatens your profitability, timeline, or creative standards, it’s okay to decline. Saying no professionally preserves your brand reputation and frees you to pursue better opportunities.
Step 13: Estimating Complex or Custom Photography Projects
Not all photography jobs are straightforward. Some clients request highly customized services, extended hours, or special deliverables. These projects require a more nuanced approach to estimation.
Break Down the Project into Components
For complex jobs, start by segmenting the work:
- Pre-production planning (location scouting, permits, special equipment)
- The shoot itself (number of days, assistants, travel)
- Post-production complexity (heavy retouching, compositing, special effects)
- Deliverables beyond standard photos (video, prints, albums, exhibitions)
Breaking the project into parts helps identify all cost drivers.
Account for Specialized Resources
Some jobs may require renting expensive equipment, hiring additional crew, or securing permits and insurance. Include these costs clearly in your estimate.
Consider Licensing and Usage
Commercial projects often involve licensing fees based on how clients plan to use your images (advertising, packaging, web, print). Clarify these terms early and price accordingly.
Build in Contingency
Complex projects have higher risks of scope creep or unforeseen challenges. Add a contingency buffer (typically 10-20%) to your estimate to cover surprises.
Communicate Clearly About Flexibility
Make it clear to clients how changes in scope or timeline impact pricing. Use change orders or addenda to document adjustments.
Step 14: Managing Revisions and Change Requests
Change requests are common in creative projects, but uncontrolled revisions can erode profits and cause delays.
Define Revision Limits
Specify how many rounds of edits are included in your price. Typical terms allow 1-2 rounds of minor adjustments.
Charge for Additional Work
If clients want extensive re-editing or new images beyond the agreed scope, have a clear rate for additional work (hourly or per image).
Keep Communication Transparent
Regularly update clients on project status and costs if changes arise. This transparency helps avoid conflicts.
Step 15: Delivering Your Final Proposal and Closing the Deal
After negotiating and finalizing details, it’s time to send a polished proposal or contract for signature.
Use Professional Proposal Software or Templates
Your final document should include:
- Detailed scope and pricing
- Payment and cancellation terms
- Licensing and usage rights
- Delivery schedule
- Signatures and date lines
Digital signing tools like DocuSign, HelloSign, or built-in platform features streamline this process.
Follow Up to Ensure Acceptance
After sending the proposal:
- Confirm receipt and answer any last questions.
- Politely remind clients to sign and return the contract.
- Once signed, request the deposit to secure the booking.
Step 16: Post-Agreement Tips to Protect Your Business
- Keep Records: Maintain copies of all signed contracts and correspondence.
- Track Payments: Use invoicing software to monitor deposits and balances.
- Prepare Thoroughly: Review the contract before the shoot to ensure you meet all obligations.
- Communicate Proactively: Stay in touch with clients to manage expectations and share updates.
Step 17: Why Automate Your Estimating Process?
Manual estimating—calculating costs, preparing quotes, and drafting contracts—can be time-consuming and error-prone. Automation helps eliminate tedious tasks, reduce mistakes, and present your estimates professionally and consistently.
Benefits of Automation:
- Speed: Generate estimates and invoices in minutes, not hours.
- Accuracy: Reduce human errors in calculations and formatting.
- Professionalism: Present clean, branded documents to clients.
- Consistency: Use templates that standardize your pricing and terms.
- Tracking: Easily monitor client approvals, deposits, and payments.
- Integration: Connect estimates with calendars, contracts, and accounting.
For photographers juggling multiple shoots, automation is a game-changer. It frees you up to focus on what you do best—creating beautiful images—while improving your cash flow and client experience.
Step 18: Choosing the Right Tools for Photography Estimation
There are numerous tools designed for freelancers and photographers to streamline quoting, invoicing, and contracts. When selecting a solution, consider these features:
- Customizable Templates: Ability to tailor estimates, invoices, and contracts with your branding and terms.
- Line Item Flexibility: Easily add hourly rates, flat fees, and expenses.
- Automated Calculations: Tax, discounts, deposits, and totals are automatically calculated.
- Digital Signing: Clients can sign contracts electronically.
- Payment Processing: Accept credit cards, PayPal, or other methods.
- Client Portal: Clients can view estimates, approve work, and pay online.
- Mobile Access: Manage estimates and bookings on the go.
- Integration: Sync with calendars, accounting software, or CRM.
Popular platforms that photographers often use include HoneyBook, Dubsado, Bonsai, and similar freelance management software. Even general tools like Google Sheets or Excel can be enhanced with formulas, but dedicated apps offer much more automation.
Step 19: Setting Up Your Estimating Templates and Workflows
Once you pick a tool, invest time upfront to build your templates and workflows. This makes future estimates faster and more accurate.
Create Tiered Packages
Predefine packages based on your most common shoot types (e.g., portrait session, event coverage, commercial project) with preset pricing and deliverables. This allows quick selection rather than building from scratch.
Include Optional Add-Ons
Have optional services like extra retouching, expedited delivery, or prints already priced to add seamlessly.
Automate Payment Terms
Set deposit requirements, payment deadlines, and late fees to trigger automatically.
Integrate Contracts
Attach your standardized contracts that clients can review and sign with estimates.
Set Reminders
Use automated reminders for clients to approve estimates or pay invoices, minimizing delays.
Step 20: Using Data to Refine Your Estimates Over Time
Your first estimate for a certain type of job may not be perfect, and that’s okay. Use data from completed projects to analyze:
- Actual vs. Estimated Time: Track how long shoots and editing took.
- Cost Variances: Compare estimated costs to actual expenses.
- Client Feedback: Note if pricing was a sticking point or well received.
- Profit Margins: Ensure your pricing covers all costs and desired profit.
Based on this, adjust your rates, add buffers, or tweak packages for future projects. Continuous refinement helps you price competitively without undercutting your value.
Step 21: Best Practices for Managing Multiple Estimates and Clients
As your business grows, keeping estimates, contracts, and communications organized is vital.
- Use a CRM System: Track leads, proposals, and client details in one place.
- Label and Archive: Keep records by date, client name, and project type.
- Follow Up Regularly: Use automated or manual reminders to close deals.
- Maintain Clear Communication: Keep clients informed about status and deadlines.
- Set Boundaries: Manage expectations around turnaround times and availability.
Being organized reduces stress and enhances your professional reputation.
Step 22: Leveraging Automation for Post-Estimate Workflow
Estimating is just the start of the client journey. Automation can help smoothly transition to:
- Booking Confirmation: Send confirmation emails and contracts automatically once the estimate is approved.
- Scheduling: Sync shoot dates with calendar apps and send reminders.
- Invoice Generation: Automatically generate invoices based on signed contracts.
- Payment Collection: Send payment links and reminders, and confirm receipt.
- Project Management: Track progress, assign tasks (editing, printing), and update clients.
This end-to-end automation makes your business more efficient and client-friendly.
Step 23: Marketing Your Professional Estimating Approach
A polished, efficient estimating process is a competitive advantage. Use it as a selling point when pitching your services:
- Highlight Transparent Pricing: Clients appreciate clear, detailed quotes upfront.
- Emphasize Professionalism: Share that you use contracts and digital signing for peace of mind.
- Showcase Efficiency: Quick turnaround on estimates can help close deals faster.
- Build Trust: Well-documented terms and automated reminders reduce surprises.
Consider adding a brief explanation of your process on your website or in proposals to set client expectations.
Step 24: Continuous Learning and Industry Awareness
The photography market and technology evolve rapidly. Stay ahead by:
- Monitoring Competitor Pricing: Adjust yours to reflect market changes.
- Learning New Tools: Explore emerging software or plugins.
- Taking Business Courses: Improve negotiation, marketing, and financial skills.
- Joining Professional Groups: Exchange tips with peers and mentors.
- Soliciting Client Feedback: Use surveys to improve your process.
An adaptive mindset keeps your business healthy and profitable.
Final Thoughts
Estimating photography jobs with confidence and professionalism is a journey. By embracing automation, refining your workflows, and leveraging data-driven decisions, you not only save time but also build a sustainable and scalable business.
Remember, your pricing reflects your talent and dedication. Protect it with smart contracts, clear communication, and tools that empower you to deliver consistent value.