Laying the Groundwork: Prepare Before You Invoice
Before generating your first invoice, cover the following foundational steps:
Establish a Business Identity
Decide how you will present yourself publicly. If you’re operating under your name, use it. If you’re using a business name, ensure it matches your bank and tax information. Having a consistent identity helps clients feel confident and reduces confusion during payment.
Define Payment Terms
Outline in advance how and when you expect to be paid. Options include milestone-based payouts, hourly billing, net‑15 or net‑30 payment terms, or advance deposits. Define late fees or early‑payment discounts. Communicating these terms upfront builds clarity and trust.
Collect Client Details
From the outset, gather the necessary information: legal or business name, address, contact person, email, and any relevant identification. For cross-border work, also ask for tax ID or VAT numbers. Having these details on file means you can easily include them on each invoice.
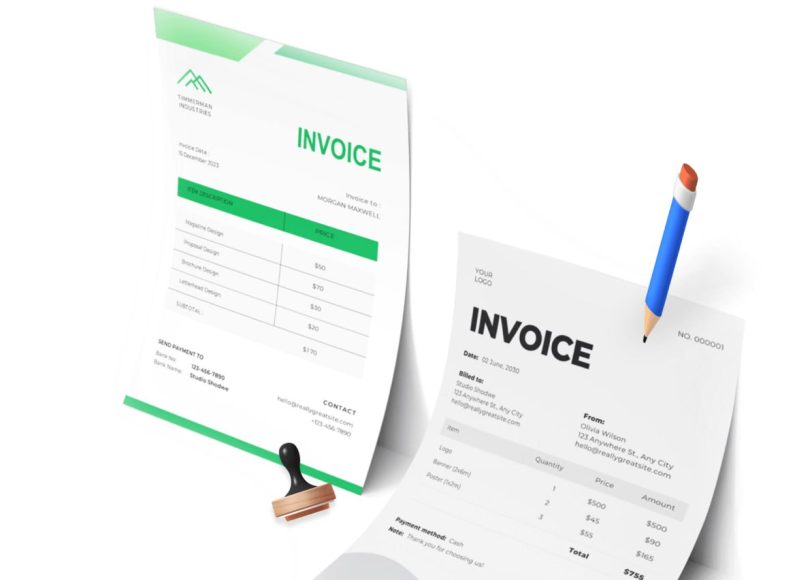
Creating a Structured and Professional Invoice
A well-organized invoice should include specific details in a clear format.
Use a Clear Header
Include an invoice title (e.g., “Invoice” or “Bill”), your name or business name, and the date of issue. Although styling isn’t the focus here, a simple structure with headings ensures clarity.
Add Your Contact Information
Include your address, phone number, and email. If applicable, add your tax ID or VAT number. Clients need this for verification and to process payment promptly.
Include Client Information
Add the client’s name or company name and address. Specify the contact person’s name. This helps ensure the invoice lands in the right inbox and reduces processing delays.
Assign a Unique Invoice Number
Numbering invoices consecutively (e.g., 1001, 1002) helps you track invoices over time. It facilitates sorting and referencing in both your records and your client’s system.
Provide Clear Dates
Include both the date issued and the payment due date, based on agreed terms. This flags any late payments clearly and ensures shared understanding of deadlines.
Break Down the Work
List all completed tasks, hours worked, or deliverables delivered. Use a tabular format with descriptions, quantities or hours, unit rates, and line‑item totals. Be as specific as possible to avoid confusion or dispute.
Show Subtotals, Taxes, and Grand Total
Automatically display a subtotal, calculate applicable taxes (e.g., GST or VAT) based on your obligations, and show the final total due. Clearly showing the overall amount minimizes payment errors.
Specify Payment Options
List accepted payment methods (bank transfer, credit card, or digital platforms). If you offer multiple channels, indicate them. Provide bank or account details. Reiterate payment terms and mention any late‑fee policy if included.
Add Notes or Terms
Include notes on early‑payment discounts, late‑payment penalties, or gratitude statements. This section reminds clients of expectations and keeps communication courteous.
Advanced Invoicing Tips for a Smooth Process
Here are eight practical tips to elevate your invoicing workflow:
1. Send Invoices Immediately
Issue your invoice as soon as a milestone is reached or deliverables are delivered. The sooner you send it, the faster you’re paid—and sending invoices promptly is a sign of professionalism.
2. Double‑Check Every Invoice
Review your invoice for accuracy: confirm project scope, quantity or hours, rates, totals, due dates, and client details. Typos or miscalculations can delay payment and undermine your credibility.
3. Offer Multiple Payment Methods
Clients vary in their preferences. Include at least two options: bank transfer and a digital method. Flexibility removes friction and can improve payment speed.
4. Use Early Payment Incentives
You might offer a small discount (e.g., 2%) for payments made within a week. Many clients appreciate the incentive and will prioritize your invoice to benefit from the discount.
5. Include Tax Obligations
If required, you must add taxes such as VAT or GST. State the tax rate and amount. This ensures compliance and avoids exposing you or your client to tax-related issues.
6. Define Payment Deadlines Clearly
Make due dates unmistakable. If you require net‑30—meaning payment is due within 30 days—state this clearly on the invoice. This allows the client to plan payment before the due date passes.
7. Maintain Invoice Records
Keep both digital and physical copies of all invoices. Organize them by date and number so you can easily track payments and prepare for tax filings or audits.
8. Automate Where Possible
Transition to invoicing tools or templates that save time and reduce errors. Once setup is complete, invoicing becomes faster, and your financial records will stay organized.
Deciding When to Send Your Invoice
Timing depends on your billing structure:
- Completion Billing: Send the invoice when work is fully delivered.
- Milestone Billing: Send invoices as each agreed milestone is completed.
- Hourly Billing: Issue invoices weekly or bi‑weekly to reflect hours worked.
- Retainer or Ongoing Services: Send invoices at the end of each billing period.
Choose a consistent schedule that reflects your cash flow needs and aligns with your clients’ payment schedules.
Setting Up for Success: What You’ll Prepare in Part 2
In the next article of this series, we’ll cover:
- How to follow up constructively when payments are overdue
- Polite reminder email templates and phone call strategies
- Handling late fees and dispute resolution
- When and how to pause work due to non-payment
- Legal options or collection agency considerations, if needed
Dealing with Unpaid Invoices: What Every Freelancer Should Know
One of the most frustrating parts of freelancing is waiting for overdue payments. Even when you’ve sent a clear, professional invoice, some clients may still delay or forget. While chasing payments isn’t the most glamorous part of your job, it’s essential for maintaining financial stability. Knowing how to follow up properly—and when to escalate—can make the difference between getting paid and letting income slip through the cracks.
Freelancers must master the art of tactful follow-up, protect their work with contracts, and establish systems that support timely payment.
Understanding Why Clients Delay Payment
Not all late payments are intentional. Before taking a hardline approach, it’s worth considering common reasons clients delay:
- The invoice went to the wrong contact or was lost in email.
- The client’s internal billing cycle hasn’t reached the payment date yet.
- Approval for the invoice is stuck with another department.
- The client is experiencing financial difficulty.
Understanding these nuances helps you respond more appropriately and maintain a professional tone during follow-ups.
How to Follow Up on an Overdue Invoice
A structured follow-up process improves your chances of getting paid while keeping the client relationship intact.
Step 1: Send a Friendly Reminder
Within a day or two after the due date, send a polite email. Reference the original invoice number, due date, and amount due. Keep the tone professional and assume good intent. A short, courteous message is usually enough.
Example:
Subject: Payment Reminder – Invoice #0043 Due on [Date]
Hello [Client Name],
I hope you’re well. Just a quick reminder that Invoice #0043, issued on [Issue Date], was due on [Due Date]. Please let me know if there’s anything you need from my end to process the payment.
I appreciate your attention to this and look forward to your response.
This soft approach shows professionalism while signaling that you’re tracking payments closely.
Step 2: Follow Up With a Phone Call
If the email goes unanswered after three to five business days, consider calling the client. A quick, polite phone call often solves issues faster than continued emails. Use the call to confirm they’ve received the invoice, ask if there are any concerns, and request a payment update.
Keep the conversation focused and friendly. Avoid accusatory language. Aim to identify the obstacle and offer a resolution.
Structuring Your Follow-Up Process
Consistency matters. Set up a weekly review of outstanding invoices. Assign statuses such as:
- Sent
- Due soon
- Overdue
- In dispute
- Paid
Use a spreadsheet or invoicing tool to track everything. Include fields for invoice number, issue date, due date, amount, status, and notes from follow-ups.
Document every follow-up attempt, including date, method (email or phone), and client response. This will be useful if you need to escalate the situation.
Sending a Formal Payment Request
If informal reminders and calls don’t work after a week or two, send a formal payment request. This document reinforces the importance of the overdue amount and clearly outlines the consequences of further delay.
Elements to Include:
- Invoice number and due date
- Services provided
- Total outstanding amount
- Payment instructions
- A revised deadline (e.g., pay within five business days)
- Reference to the agreement or contract, if applicable
- Mention of late fees (if stated in the original terms)
Example:
Subject: Overdue Invoice – Immediate Attention Required
Dear [Client Name],
This is a formal reminder that Invoice #0043, originally due on [Date], remains unpaid. As per the payment terms agreed upon, the amount of [$Amount] is now overdue.
Kindly arrange payment within five business days to avoid any further delays. A late fee may be applied as outlined in our agreement.
Please let me know if you need the invoice resent or if there’s anything blocking payment.
This creates urgency without being confrontational.
What If the Client Still Doesn’t Pay?
Unfortunately, not all clients respond to gentle nudges. If you’ve sent multiple reminders, called, and issued a formal notice, you may need to escalate.
1. Stop Work
If the client has more projects with you or you’re midway through ongoing work, pause services until payment is received. Politely inform them that continuing work without resolution of the outstanding invoice isn’t feasible.
2. Offer a Payment Plan
If the client is facing genuine financial difficulties, consider proposing a structured payment plan. Receiving partial payments is better than nothing. Define installment amounts and dates, and get confirmation in writing.
3. Apply Late Fees (If Applicable)
If your payment terms include penalties for late payments, now is the time to apply them. Be transparent and refer to the terms shared in the original invoice. Clearly show the late fee amount and the new total owed.
4. Send a Final Demand Letter
If the amount is significant and your previous attempts have failed, a final demand letter is the last step before legal action. It should:
- State the overdue invoice
- List previous follow-ups
- Mention that legal steps or collections may follow if payment isn’t made.
- Include a final payment deadline.
Keep it firm but factual. A final demand letter often motivates clients to act quickly.
When to Get Outside Help
There comes a point when outside intervention becomes necessary. If the amount due is substantial, and the client remains unresponsive after all communication, consider:
Hiring a Collection Agency
Agencies will pursue the payment on your behalf, usually for a percentage of the amount recovered. This can be a viable solution for large unpaid invoices. However, be aware of reputational risks and ensure the agency uses ethical practices.
Seeking Legal Counsel
For major disputes or breaches of contract, consult a lawyer. A demand letter from a legal representative can carry more weight. If needed, small claims court is another option, especially for domestic clients.
Before pursuing legal action, weigh the costs involved versus the potential recovery. In some cases, it might be more practical to cut losses and avoid working with the client again.
Avoiding Future Late Payments
The best way to deal with unpaid invoices is to prevent them in the first place. Use these strategies to reduce the risk:
Always Use Contracts
A written agreement protects both you and the client. Include clear payment terms, deliverables, timelines, revision limits, and cancellation clauses. Even simple service contracts can save you major trouble later.
Request Deposits or Partial Payments
Start projects only after receiving a portion of the payment upfront—typically 30% to 50%. This helps cover your time and signals that the client is committed.
Send Invoices Promptly
Don’t delay sending your invoice once work is complete. Waiting a week or two reduces urgency on the client’s side. The sooner you invoice, the faster the payment process begins.
Clarify Payment Methods Early
Some delays stem from mismatched expectations on payment methods. State your accepted methods clearly in both your proposal and invoice. If you only accept bank transfers or digital wallets, your client should know that upfront.
Using Invoicing Software to Track and Remind
An invoicing platform can automate much of the follow-up process. Features like scheduled reminders, overdue alerts, recurring invoices, and automatic late fees can help enforce your payment terms without requiring manual outreach every time.
Track which invoices have been sent, paid, or are overdue. Generate reports to analyze your billing patterns and client payment habits.
Automation also ensures professional communication. Reminders can be triggered without appearing aggressive, maintaining client goodwill while emphasizing payment urgency.
Structuring Freelance Invoices and Using the Right Format
Freelancing comes with the freedom to choose your projects and set your hours, but it also demands serious organization, especially when it comes to getting paid. Invoices are not just documents; they are a critical part of your business communication. A poorly structured or unclear invoice can delay payments, confuse clients, and even hurt your credibility. That’s why knowing how to structure your invoices—and when and how to use the right format—is essential to freelancing success.
Essential Components of a Well-Structured Freelance Invoice
Creating a well-organized invoice means including all the essential information clients need to process your payment quickly. Every invoice should include the following elements:
Your full name or business name should appear at the very top. If you operate under a business name, include that. If you work under your name, make sure it is clear and consistent across all your business documents.
Your contact details—such as your business address, phone number, and professional email address—should be listed directly under your name. This allows the client to easily reach you if there are any questions about the invoice.
The word “Invoice” should be prominently displayed to clearly define the document type. Confusion between quotes, estimates, and invoices can delay payments, so clarity is key.
Include a unique invoice number. This helps you and your client track and reference past payments. A good practice is to use a sequential system that includes the year or month, such as 2025-003.
Add both the invoice issue date and the payment due date. The issue date marks when the invoice was created, and the due date defines the deadline for payment. This can be a fixed number of days from issue (for example, 14 or 30 days), depending on your agreement.
Your client’s full name, company name (if applicable), and business address should be listed. If you know the name of the contact person or accounts department, include that as well.
In the body of the invoice, include a description of the services provided. Be clear and concise. Instead of writing “design services,” specify what you did, such as “redesign of homepage banner graphics.” Provide the rate—either hourly or per project—and mention the number of hours or units, if applicable.
List the total amount due. If taxes apply, mention them separately. Show the subtotal, tax amount, and the final payable amount.
Lastly, include your payment terms and methods. Let the client know whether you accept bank transfers, payment platforms, or other options. Include relevant account details or links and clarify any penalties for late payments or discounts for early ones.
Choosing the Right Invoice Format Based on Freelance Work Type
Not all invoices are the same. Depending on the nature of the freelance project, different formats may be more suitable. Let’s break down the most common invoice types and when to use each.
Flat Rate Invoice
This type is best for projects where you’ve agreed on a fixed total amount before work begins. It’s straightforward and perfect for simple jobs with a clear scope. For instance, if you’ve agreed to design a website for $1,500, your invoice simply mentions the service and the total amount.
Flat rate invoices work well when there is no hourly breakdown, and the deliverables are clearly defined. Clients appreciate the clarity, and it helps avoid disputes over time tracking.
Hourly Rate Invoice
If you charge by the hour, use an hourly rate invoice. Clearly state the number of hours worked, the agreed-upon hourly rate, and the service performed during each block of time.
This format is ideal for ongoing tasks like consulting, writing, programming, or design work where the time invested may vary from project to project.
Keep accurate time logs using a tracking app or digital timesheet. In case of any questions or audits, your logs will support the validity of your invoice.
Milestone-Based Invoice
For long-term or large-scale projects, milestone invoicing is often preferred. This approach divides the project into stages, and you invoice the client after each phase.
It might be useful for development, content campaigns, branding projects, or anything that spans weeks or months. Always get written agreement from your client about milestone definitions and payment triggers.
This type of invoicing is excellent for improving cash flow throughout extended contracts and helps reduce risk for both the freelancer and the client.
Recurring Invoice
Recurring invoices apply when you’re providing an ongoing service—like monthly content creation, marketing management, or customer support. These invoices are issued at regular intervals, typically monthly or quarterly.
To reduce your workload, set up automated invoicing if you use software. Always specify the billing period in each invoice to avoid confusion.
Pro Forma Invoice
A pro forma invoice isn’t a payment request, but rather a preliminary bill sent before the actual work begins. It helps clarify the scope and cost of the job for the client. While not legally binding, it sets expectations and is sometimes needed for internal approval on the client’s side.
Pro forma invoices are useful in corporate settings or when the client’s accounting department requires advanced documentation.
Final Invoice
Once all deliverables are complete, the final invoice is issued. This is your last bill for the project, and it typically includes any pending balances and states that no further charges are expected unless additional work is agreed upon.
Freelancers often include a note such as “Final Invoice for XYZ Project” to signal the conclusion of the work and closure of the financial transaction.
Tone and Language in Freelance Invoices
Even though invoices are professional documents, they’re also a direct extension of your client communication. The tone should be formal, polite, and clear.
Avoid casual phrases like “Hey, your bill’s ready” or overly direct statements such as “You owe me now.” Instead, use language like:
“Please find the attached invoice for services provided during June. Kindly arrange for payment by July 5th as per our agreement.”
This tone maintains professionalism and shows that you’re organized and serious about your freelance business.
In follow-ups, keep your reminders respectful. A message such as, “This is a friendly reminder that Invoice #205, dated June 2, is still outstanding. Kindly let me know if payment has been processed,” is polite yet assertive.
Why Accuracy and Clarity in Invoices Matter
Your invoice should be easy to understand at a glance. Avoid ambiguous descriptions. Rather than writing “freelance work,” clarify what kind of work was completed. For example, write “SEO optimization of 5 product pages” or “Proofreading and editing of client proposal document.”
Use simple math and avoid rounding errors. If you are charging tax, calculate it precisely. Misstated amounts or vague language can result in disputes and delays.
If your client operates internationally, include the correct currency and exchange terms. Always mention the billing currency (such as USD, EUR, or GBP) and whether taxes are included or excluded.
Invoicing International Clients
Working with clients across borders requires a few additional considerations. First, clarify the currency up front in your agreement. Avoid assuming that the client will pay in your local currency unless previously discussed.
Second, include your country’s tax ID or registration number if required by local laws. Some countries require tax disclosures even for digital services sold abroad. For example, some freelancers in Europe must include VAT details.
Language should be neutral and formal. Avoid region-specific slang or legal terminology that may confuse the client. Keep your layout simple, clean, and direct.
Maintaining Records and Templates for Future Use
As you grow your freelancing business, keep records of every invoice sent. Organize them by date, client, and status (paid, pending, overdue). This practice helps during tax season, audits, and when resolving client disputes.
Create reusable invoice templates for different types of projects. You can maintain versions for flat rate, hourly, and milestone-based billing. Store them in folders categorized by client name or project type.
Always send invoices in a universal file format such as PDF. This ensures readability and compatibility across devices and operating systems. Name the file—for example, “Invoice_RitaRoy_LogoDesign_June2025.pdf”—to make it easily identifiable.
Automating and Optimizing Your Freelance Invoicing Workflow
As a freelancer, time is your most valuable resource. Every minute you spend chasing unpaid invoices, fixing errors, or manually sending payment reminders is time not spent on billable work. To build a thriving freelance career, you need to optimize your invoicing workflow, making it smooth, efficient, and largely automated.
Why Freelancers Should Automate Invoicing
Manual invoicing might be feasible when you have only one or two clients. But as your workload increases, creating invoices from scratch becomes impractical. Automation is the solution to save time, avoid mistakes, and improve professionalism.
Automating your invoicing offers benefits that go beyond efficiency. It minimizes late payments, helps you manage taxes, reduces paperwork, and enables real-time visibility into your income. Freelancers who automate their invoice workflows can also project their cash flow more accurately and avoid the stress of last-minute follow-ups.
By using automation, you can set recurring invoices, apply templates, track overdue payments, and even integrate time-tracking tools to generate bills with a single click.
Features to Look for in Invoicing Software
When choosing a system to manage your freelance billing, focus on these core features to ensure long-term utility:
Support for multiple invoice types. Whether you bill per hour, per project, or by milestones, the system should adapt to your billing model.
Customizable templates. You should be able to add your logo, adjust layout elements, and format the invoice for various clients or regions.
Tax calculation and compliance tools. Automated tax inclusion based on your region helps keep your finances legal and organized.
Multi-currency support. Essential for freelancers working with international clients.
Payment integrations. The platform should support direct payment through gateways like PayPal, Stripe, and credit cards.
Automated reminders. Systems that send follow-up emails before and after the due date help reduce delays.
Expense tracking. Some invoicing tools allow you to input expenses and automatically add reimbursable costs to client bills.
Real-time reporting. Dashboards that summarize paid, pending, and overdue invoices help you stay informed and in control.
Invoice scheduling. Automatically generate and send invoices on a preset date.
Client management. Store client data, past communications, invoice history, and notes all in one place.
Setting Up a Smooth Invoicing Workflow
Start by identifying your typical invoice pattern. Do you bill weekly, monthly, or per milestone? Once you understand the rhythm of your work, use a system to mirror that structure. Here is how you can design an effective invoicing workflow:
Create an invoice template. Include all required elements such as your name, client details, line items, taxes, and payment instructions. Save a master version to reuse.
Log time or deliverables as you work. Whether through a spreadsheet or time-tracking tool, keep a record of the work you’ve done.
Generate the invoice at the end of each billing cycle. Use automation to pull project or timesheet data into your template.
Review for accuracy. Even automated systems require a final check. Confirm the invoice date, due date, and amounts.
Send the invoice. Email it directly through the platform or download a PDF to attach manually.
Set up reminders. Schedule a payment reminder to go out three days before the due date, and a follow-up if payment is not received.
Mark the invoice as paid once funds arrive. Maintain updated records to avoid confusion at tax time.
Archive invoices and related communications for each client. Having this data organized can help you resolve disputes or report income efficiently.
Creating an Invoice System That Works Globally
If you work with clients across borders, your invoicing system needs to account for global requirements. Here are essential considerations:
Use international date formats. Write dates as day/month/year or month/day/year clearly to avoid confusion.
State the currency. Mention clearly whether the amount is in USD, EUR, GBP, or another currency. This avoids mismatched payments or exchange-rate confusion.
Add tax identifiers. If required by law, include your tax number or business registration number.
Clarify payment options. International clients may prefer digital wallets, bank transfers, or local payment services. Provide these details upfront.
Accommodate language preferences. If your client is based in a non-English-speaking region, consider translating the invoice or keeping the language simple and universal.
Factor in transaction fees. International transfers can result in additional charges. Clarify who is responsible for those fees—yourself or the client.
Understand local tax rules. Some countries require a VAT or GST number on all invoices. Do your research or consult a tax advisor to stay compliant.
Using Time Tracking to Automate Hourly Invoicing
If you work on an hourly basis, integrating time tracking with your invoicing platform is a game-changer. It removes the need to manually log hours or remember what you worked on last Tuesday.
Start by selecting a reliable time tracker. Use one that allows tagging projects, labeling tasks, and noting breaks or non-billable time.
At the end of the billing cycle, generate a report from your time tracker. Most invoicing systems let you import this data directly to build the invoice.
If not, copy the summary into your invoice manually, ensuring each task is paired with its duration and rate. Provide just enough detail to make your work transparent, but not overwhelming.
Automated timesheets can be particularly helpful in retainer contracts or long-term client relationships. They not only speed up invoicing but serve as evidence in case of disputes.
Managing Late Payments Professionally
Even with the best system in place, some clients will delay payments. When this happens, your response should be timely, consistent, and respectful.
Avoid sending emotional or accusatory messages. Stick to factual, professional language. Begin with a polite reminder just before or on the due date. If there’s still no response, send a follow-up reminder after three to five business days.
After two or three reminders, escalate by offering to speak directly or proposing a payment plan. If all else fails and the payment is substantial, you may need to consult a collections agency or legal support.
To minimize such risks, always include clear payment terms in your contracts, including late fee policies. A gentle note like “A 3% late fee applies for invoices unpaid after 15 days” can encourage timely payment.
Creating Recurring Invoices
Recurring invoices are perfect for freelancers with ongoing projects. Whether you’re managing social media, delivering blog content, or handling monthly website updates, recurring billing reduces friction.
Set the invoice to repeat on a specific day each month. Add the same line items with minor edits to reflect the billing cycle.
Choose a recurring schedule: weekly, monthly, quarterly, or custom. Then enable automatic sending and, if supported, automatic payment processing.
Make sure to still review these recurring invoices once a month to avoid duplicate charges or outdated information.
End-of-Month Reporting and Tax Management
When the month ends, freelancers must reconcile their finances, especially if they operate as a registered business. Use your invoicing software’s reporting features to:
Track income by client or project.
Summarize unpaid or overdue invoices.
Generate exportable reports for bookkeeping or tax prep.
Keep digital copies of all invoices in cloud storage and label them by year and client name.
For freelancers who operate internationally or file quarterly taxes, consider hiring a tax consultant. Proper invoice organization makes it easy to share records during tax season and reduces the risk of mistakes or missed deductions.
Backing Up Your Invoicing Data
Data loss is not just an inconvenience—it’s a liability. Losing invoice records can lead to missed payments, duplicate work, or regulatory problems.
Make it a habit to back up your invoice data weekly. If your system supports cloud backups, enable them. Also, export your invoice data as spreadsheets or PDFs and save them on an external hard drive or encrypted storage platform.
For long-term archiving, organize backups by year, client, and project category. This makes it easier to retrieve past invoices when needed for tax audits or contract reviews.
Final Thoughts:
Mastering freelance invoicing means more than sending out bills. It requires organization, discipline, and a willingness to adopt smart systems that work in the background while you focus on creating and delivering value.
By automating your invoicing process, customizing your workflow, and staying compliant with tax and payment regulations, you can protect your income, enhance your client relationships, and free up time to grow your freelance business.