Accessing the Invoice Layout Section
To begin creating custom invoice layout templates, the first step is to navigate to the template section within your invoicing system. This section provides access to existing layout templates and allows the creation of new ones. Start by selecting the appropriate tab from your dashboard. Within the menu, locate and click on the option that leads to invoice and estimate layouts. This page displays all current templates you’ve used or created. From here, you’ll begin customizing your new layout from scratch or modify an existing template to better suit your needs.
Initiating a New Layout Template
Once you’re on the layouts page, the system allows you to begin a new template creation process by clicking the new invoice layout button. This initiates the layout builder, prompting you to choose one of three pre-designed base templates. These templates provide a foundational structure that includes core elements like the header, client section, business details, line items, and totals.
Choosing the right starting point is important because it shapes the overall look and layout of your future invoices. Consider how much detail your business typically includes on an invoice, whether you need space for shipping information, or if your clients require clear formatting for taxes and discounts.
Exploring the Invoice Builder Interface
After selecting your base template, you will be redirected to the invoice builder page. This is where the actual customization takes place. The invoice builder presents a live preview of your invoice, allowing you to see how each change you make is reflected in real time. Each section of the invoice is interactive.
By clicking directly on the text or block you want to edit—whether that’s the logo, header title, or client information—you can make immediate changes. This hands-on interface eliminates the need for technical design skills or coding knowledge, enabling anyone to create professional-looking invoice templates.
Customizing the Header Section
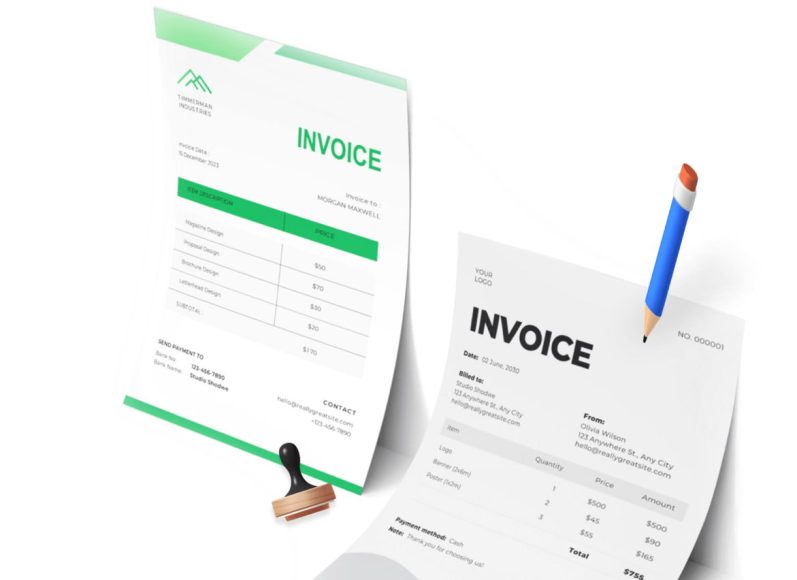
The header is often the first element your clients see, and it plays a major role in how your invoice is perceived. It usually includes the document title, such as “Invoice,” “Tax Invoice,” or “Service Bill.” To change this, click on the header section within the builder. You can then enter any custom title you prefer.
For example, if your region mandates that you label your invoice as a “Tax Invoice” for VAT purposes, you can easily adjust the text accordingly. After editing, click save to confirm the changes. If you later decide to revert back to the original template title, you can click the reset input button which restores the default header label.
Adding Business Information and Details
Your business information needs to be complete, clear, and well-formatted on every invoice. In the customization panel, clicking the business info section allows you to input your company name, address, contact details, registration number, and other relevant identifiers. The system offers placeholders for these fields, which can be inserted into the text box with a single click.
These placeholders automatically pull the correct data when the invoice is generated, ensuring consistency and accuracy across all invoices. You can customize the display format to align with legal and regulatory standards in your country. This also allows space for industry-specific certifications, government-issued identification numbers, or branch office details.
Uploading and Adjusting the Logo
A custom logo is an essential element of a branded invoice. It provides visual recognition and adds professionalism to the document. To include a logo, select the logo section from the invoice builder. You’ll be prompted to upload an image file from your device. This logo can be different from your account’s default logo if needed.
Once uploaded, you can adjust its size by modifying the width and height settings to make sure it fits well within the header or footer. A well-placed and correctly scaled logo ensures your invoice aligns visually with your brand identity, which can help establish trust and consistency with your clients.
Editing Client Information Fields
The client information section should contain all necessary details about the recipient. These typically include the client name, billing address, email, and account number. Click the client info button to open the editing panel. You can insert placeholders for each data point, which can be auto-filled later when creating an actual invoice.
This approach avoids repetitive typing and minimizes human error. The customization options also allow the inclusion of unique identifiers such as membership numbers, project names, or department codes. This level of detail helps streamline client communication and ensures invoices are routed and processed efficiently.
Including Shipping Information
If your business involves delivering goods, shipping details are critical. The invoice layout builder includes a section specifically for shipping info. By clicking on this section, you can input fields like the shipping address, contact person, and any tracking or delivery instructions. Placeholders make it easy to populate the data dynamically.
Whether you’re sending products locally or internationally, including accurate shipping information on your invoices adds a layer of clarity and helps avoid logistical mistakes. It also supports compliance with trade and shipping documentation standards, which can be particularly useful for import-export businesses.
Using Custom Fields for Flexibility
No two businesses operate in exactly the same way, and that’s why the ability to add custom fields is so valuable. Click the custom fields button to open a section where you can define new input fields that aren’t part of the standard template. For instance, you might want to add a purchase order number, internal project code, or a reference to a specific contract.
You can name these fields anything you like and choose whether they should appear in a specific position using up and down arrows to reorder them. If the field does not have a fixed input, you’ll be prompted to enter the value manually whenever you use the layout to create a new invoice. This flexibility ensures that your invoices are as detailed and informative as needed.
Renaming Invoice Labels for Clarity
Label customization is an essential feature for businesses operating in multiple languages or industries with specific terminology. By clicking the change labels button, you can rename any part of the invoice such as “Subtotal,” “Discount,” “Unit Price,” or “Due Date.” This can be particularly helpful if you need to translate the invoice into another language or want to align terminology with legal or corporate standards. For example, if your organization prefers the term “Statement of Fees” instead of “Invoice,” this can be changed instantly without affecting the invoice’s structure or functionality.
Editing the Invoice Footer
The footer provides space for important notes, legal disclaimers, or payment instructions. Click the footer section to open the editing area. Here, you can add free text or placeholders for common footer elements. This might include bank account details, return policies, support contact information, or a thank-you note. A well-written footer not only provides essential information but also adds a professional touch that encourages timely payment and reinforces your relationship with the client.
Naming the Template and Saving Changes
Once all the sections have been customized, the next step is to name your new layout template. Choose a name that clearly reflects its purpose, such as “Retail Invoice,” “Wholesale Template,” or “Consulting Format.” A descriptive name makes it easier to locate and apply the correct template in the future. After naming the template, click the save button to store it in your system. All your changes will be preserved and can be reused whenever you generate a new invoice.
Setting Template Defaults for Workflow Efficiency
To streamline your workflow, you can assign your new template as the default layout for different invoice types. Check the box next to each category: invoice, estimate, or time-based billing. This ensures that the system automatically uses your preferred layout without needing to select it manually each time. In addition to layout preferences, you can also configure display settings.
Options include hiding the currency symbol in the items list, always showing the paid amount and balance due, or adding a secondary shipping address. These settings offer granular control over how your invoices look and what information is displayed to the recipient.
Applying Your Template During Invoice Creation
Once your custom template is saved, applying it to real invoices is easy. Navigate to the invoice creation page. Here, you’ll find a dropdown menu labeled invoice layout. Select your newly created template from the list. All the customizations—fields, labels, design, and structure—will be automatically loaded into the invoice form. This feature ensures every invoice you send is consistent, professional, and tailored to your business needs.
Advanced Strategies for Designing and Optimizing Custom Invoice Layout Templates
Creating a custom invoice layout goes far beyond aesthetics. It encompasses efficiency, clarity, compliance, and client communication. After learning how to build a custom invoice template, the next step is to refine and optimize that layout to support your broader operational goals. Whether you’re a freelancer issuing time-based invoices or a mid-sized business with varied billing needs, well-thought-out template design can significantly impact cash flow, brand identity, and client satisfaction. Strategic considerations and enhancements you can apply to invoice templates to elevate your invoicing process.
Structuring the Invoice Layout for Readability
The structure of an invoice plays a major role in how easily clients can process and understand it. A poorly structured invoice may lead to delays in payment or miscommunication about charges. A well-structured one, however, guides the client logically through the document from top to bottom. Start with the header, which sets the tone and provides an immediate understanding of what the document is.
Following this should be your business information and client details. These give context to the invoice by clearly identifying both parties involved in the transaction. The middle section, where items or services are listed, should be formatted in clear columns with labels such as quantity, description, unit price, total, tax, and discounts. Make sure the final summary section stands out with totals, payment terms, and due dates.
By organizing these sections with proper spacing and visual cues such as lines or blocks, clients will be able to quickly scan the invoice and grasp all essential information. Avoid cramming too many details in small font sizes or using overly complex color schemes that may reduce legibility.
Prioritizing Payment Information
One of the most critical purposes of an invoice is to get paid. That means your payment instructions need to be unmistakably clear. When optimizing your custom template, ensure that bank account numbers, payment platform details, QR codes, or payment links are easy to find. The payment terms should clearly indicate when the amount is due and any applicable late fees.
You might also include a “payment due by” date that is automatically generated based on the issue date plus the payment window, whether it’s 15, 30, or 45 days. Consider placing the payment information either directly below the total summary or in a dedicated footer section. You can use a placeholder field to dynamically update payment details per invoice if needed, such as varying payment links or customer-specific instructions.
Ensuring Tax and Legal Compliance
Businesses operating across different jurisdictions may need to include region-specific information for tax compliance. This can include tax registration numbers, value-added tax identifiers, GST, or withholding tax declarations. Customize your invoice layout to ensure all legally required data is present. This might involve adding a tax summary section at the bottom or including fields that detail each line item’s tax rate. You may also wish to list the applicable tax code or jurisdiction per item in the invoice table.
Make use of customizable fields to capture these variations. Some businesses may even need to insert legal disclaimers or approval declarations in the footer. For international invoices, clearly define the currency and exchange rates if the transaction was converted.
Customizing for Different Business Models
A significant benefit of custom invoice layouts is that they can be tailored to fit diverse business models. A freelancer might prefer a minimalist template that highlights hours worked, hourly rate, and project notes. Meanwhile, a wholesale distributor may need extensive product information, line-item taxes, and batch numbers. A service provider might need sections to describe service tiers, delivery milestones, or service-level agreements.
This is where creating multiple templates becomes practical. Instead of using one standard layout for all clients or services, build a few variations that cater to each workflow. Assign one as the default for product sales, another for service invoices, and a third for project-based billing. With the right template applied to the right invoice type, your business becomes more agile and your documents more useful to recipients.
Using Placeholders for Dynamic Data Entry
Efficiency increases when repetitive information is automated. Placeholders serve as variable fields in your template that auto-populate based on stored customer and business data. These include fields like client name, address, invoice number, invoice date, and due date. When generating a new invoice, these placeholders automatically insert the correct data, reducing manual entry errors and saving time.
Advanced users can even build logic into how placeholders behave. For instance, you could set a placeholder to insert a conditional note such as “Late fee will be applied after due date” if the due date field is less than today’s date plus 15 days. This makes the invoice not just a document, but a smart tool that communicates relevant information based on context.
Making Room for Notes and Custom Messages
While an invoice is primarily a financial document, it can also be used to maintain a positive relationship with your clients. Include a notes section in your layout to allow for personalized messages or project summaries. This section can be used to thank the customer, provide a summary of deliverables, mention the next project milestone, or confirm ongoing service terms.
These messages add a human touch and help maintain continuity, especially if you invoice the same client regularly. Moreover, customized notes can be useful for record-keeping, especially when they summarize a discussion or agreement made outside formal documentation.
Optimizing for Mobile Viewing and Printing
Today, many clients view invoices on their smartphones or tablets before they ever print them. That makes mobile readability a key consideration in template design. Choose a layout that uses clean lines, legible fonts, and responsive sections. Avoid using too many columns or horizontal scrolling elements. Ensure that all important fields—such as amount due, due date, and payment instructions—are visible without the user needing to zoom or scroll excessively.
For print readiness, ensure your layout conforms to standard paper sizes such as A4 or Letter. Margins should be consistent, and any images like logos should be optimized for print resolution. Avoid using background colors that may drain printer ink unnecessarily.
Minimizing Clutter with Collapsible or Conditional Sections
Sometimes, you don’t need every field on every invoice. Advanced template design allows for collapsible or conditionally visible sections. For example, if shipping details are not required for digital services, you can configure the layout to hide this section unless shipping data is entered. Similarly, a purchase order number field can remain hidden until it is relevant.
This dynamic functionality ensures that your invoices remain clean and uncluttered, while still being capable of handling complex scenarios. Conditional sections also help in maintaining professionalism, as blank or irrelevant fields can make the document look poorly formatted.
Creating Templates for Estimates and Time-Based Invoicing
Estimates and time-based invoices often follow a different structure than standard product invoices. An estimate needs to present projected costs and may include expiration dates, terms for approval, or special offers. Time-based invoices, on the other hand, often include breakdowns by date, time logged, or activity performed.
You can create templates specifically for these scenarios. For estimates, ensure the title clearly says “Estimate” or “Quotation,” and include an acceptance line or checkbox. Add expiration details and terms such as validity period or deposit requirements. For time-based invoicing, include fields for task name, hours worked, rate per hour, and description of work done. You may also include project names, billing phases, or retainer information for better transparency.
Including Branding and Color Schemes
Your invoice should not look like a generic form. It should reflect your brand’s visual identity. Include your company’s primary colors, typography, and graphic elements that match your website or marketing materials. This builds trust and makes your invoices easily recognizable.
Use color sparingly and purposefully. Highlight only essential areas like the total due, due date, and your logo. Too much color or the wrong combinations can distract or reduce legibility. Stick to a consistent layout and avoid excessive decoration.
Testing and Previewing Before Finalizing
Before using your new layout for live billing, test it thoroughly. Generate a few sample invoices using different client types and transaction models. Check how all placeholders render, how fields align when long names are entered, and whether the invoice still looks balanced with minimal or excessive line items. Also, test across different browsers, email clients, and PDF viewers.
Invite feedback from internal team members or trusted clients. They might point out issues with clarity or offer suggestions for improvement. Based on this feedback, refine the layout before deploying it as your default template.
Securing Sensitive Information
Invoices often contain private data—addresses, tax IDs, bank account numbers, and more. Design your template with security in mind. If your template includes dynamic fields that pull data from client records, ensure access controls are in place to prevent unauthorized edits. Also, avoid over-sharing. For instance, not every client needs to see your internal project codes or inventory references.
When sharing the invoice digitally, consider generating password-protected PDFs or using encrypted delivery methods. Your template design should make it clear what’s necessary and what’s optional, allowing you to remove any sensitive sections that aren’t required.
Updating Templates as Your Business Evolves
Business requirements change over time. You may expand internationally, adopt new payment systems, introduce new services, or revise your branding. Revisit your invoice layouts periodically to ensure they reflect your current identity and processes. Schedule an annual review of all your templates to keep them aligned with your evolving business model.
You may also find that different departments or teams within your organization have unique invoicing needs. Creating team-specific templates ensures each part of your business can operate efficiently while still maintaining brand consistency.
Automating and Integrating Custom Invoice Layout Templates into Business Workflows
After designing and optimizing your custom invoice layout templates, the final step is integrating these templates into your daily business operations. Automation, synchronization with billing and accounting systems, and data-driven enhancements can take your invoicing process to the next level.
Custom templates, when used strategically, can reduce manual labor, minimize errors, and improve financial transparency across departments. This article explores how to leverage your custom invoice templates for automation, integration, financial tracking, and long-term scalability.
Embedding Templates into Your Invoice Workflow
The first step in automation is embedding your templates directly into your existing invoicing workflow. This includes linking templates to specific actions like recurring billing, quote approvals, service completions, or delivery confirmations. For instance, when a project milestone is marked as complete in a project management system, the appropriate invoice template can be triggered automatically with pre-filled data. This eliminates the need for users to manually select layouts and populate fields.
Integrating templates into workflows ensures consistency. Each invoice generated through automated processes will follow a uniform format, improving professionalism and compliance. It also reduces training overhead, since employees no longer need to make format decisions or memorize which layout fits a particular scenario.
Automating Recurring Invoices
For subscription-based services or long-term contracts, recurring invoices are a key part of maintaining consistent cash flow. Custom invoice templates can be configured to support recurring billing cycles such as weekly, monthly, or quarterly. Once the layout is selected and linked to a customer profile or subscription plan, the system automatically generates and sends invoices on schedule.
Custom fields can be dynamically populated with billing cycle details, service descriptions, and updated totals. By automating this process, businesses can ensure timely invoicing without staff involvement, while also providing customers with predictable, professional documents that build trust and credibility.
Linking Templates to CRM and Accounting Systems
Efficiency improves dramatically when custom invoice templates are connected to your customer relationship management (CRM) and accounting platforms. These integrations allow real-time data sharing, reducing duplicate entry and ensuring accuracy across systems. Customer information from your CRM—such as names, billing addresses, contact information, and deal references—can populate invoice fields automatically.
On the accounting side, integrating with financial software enables automatic updates to accounts receivable, income statements, and tax reports. When an invoice is issued using a custom template, the payment status, tax breakdown, and revenue category can be logged instantly. This creates a seamless pipeline from invoice generation to ledger reconciliation and financial reporting.
Triggering Invoices from Operational Events
Templates become even more powerful when they are used as outputs from operational triggers. For example, completing a sales order, logging time on a timesheet, or processing a service ticket can initiate invoice generation using a predetermined layout. These event-driven triggers ensure that billing is not delayed and that all chargeable activities are accounted for.
This approach is especially valuable for service-based industries where tasks or hours may vary per client. By connecting operational systems to invoice templates, businesses eliminate the risk of missing billable events and improve the timeliness and accuracy of invoicing.
Generating Batch Invoices with Custom Layouts
Many businesses need to issue multiple invoices at once—such as for a client portfolio, product batch, or subscription cycle. Custom invoice layouts can be integrated into batch processing workflows, allowing for hundreds of invoices to be generated simultaneously, each with tailored content.
During batch generation, templates dynamically adapt based on client type, billing arrangement, or service tier. For example, a premium client may receive a layout with detailed service logs, while a basic tier client gets a simpler summary format. Automation rules can select the appropriate template for each invoice, reducing the need for manual intervention.
Integrating with Payment Gateways
Payment integration further enhances your custom templates by making it easier for clients to act on the invoice. Templates can include payment links, QR codes, or embedded buttons that connect directly to your payment processor. These elements can be configured to match the invoice layout and align visually with your brand.
When a client receives the invoice, they can immediately click to pay without switching to another platform or contacting your office. This frictionless experience encourages prompt payments and reduces the number of follow-up reminders. Invoices that include integrated payment features are more likely to be settled on time.
Tracking Invoice Performance with Analytics
Once your templates are in use, it becomes important to track their performance. By linking your invoice system with analytics tools, you can monitor metrics such as average payment time, invoice open rates, common payment delays, and client response behavior. These insights help you understand which layouts are most effective and where friction might exist in the invoicing process.
For instance, if one template consistently results in faster payments, you may choose to make it your default. If another is often overlooked or delayed, that might indicate it’s too complex or missing key information. Over time, data-driven refinements can be applied to optimize every aspect of your templates.
Customizing Templates for Departmental Needs
Larger businesses often have multiple departments with unique billing requirements. Sales, customer service, technical teams, and finance may each need their own invoice layout to include job-specific fields, terminology, and data. Custom templates allow you to support these differences while maintaining a consistent brand appearance.
You can assign templates to departments based on service categories, internal rules, or customer profiles. For example, the technical services team might use a layout that includes technician names, service dates, and troubleshooting notes, while the product sales team uses a layout focused on SKUs, delivery charges, and item quantities. This segmentation ensures each invoice supports its specific operational context without sacrificing usability.
Building Templates for International Clients
When serving clients across borders, invoice templates must reflect regional preferences and legal standards. Custom layouts can be designed for each region, including local languages, currency formats, date structures, and tax terminology. You can also include local disclaimers, fiscal stamps, or electronic invoicing codes as required by law.
Multilingual templates allow you to provide localized communication that resonates with international clients. Currency fields can automatically convert amounts, display exchange rates, or offer dual-currency presentations. This approach increases invoice clarity, reduces disputes, and ensures compliance with international regulations.
Automating Follow-Ups with Template-Driven Reminders
Late payments can disrupt cash flow, but manually chasing clients is time-consuming. With smart template integration, follow-up reminders can be automated based on invoice status and due date. Templates can include follow-up logic such as reminder frequency, email content, and escalation procedures.
When an invoice remains unpaid beyond a certain threshold, a reminder email can be generated using a predefined layout that includes the original invoice as an attachment or link. These messages can be personalized based on client history and tone—ranging from friendly nudges to formal notifications. Custom layouts ensure the follow-up matches your communication style while maintaining legal clarity.
Leveraging Templates for Internal Audits and Approvals
Invoices are not only client-facing documents—they also serve internal administrative purposes. Templates can be structured to support pre-issue approval workflows. For instance, before sending an invoice, it may need to be reviewed by an account manager, project lead, or finance supervisor. Your custom layout can include an internal approval field or watermark to indicate approval status.
Templates can also include audit-friendly fields such as invoice origin, preparer name, issue timestamp, and revision history. These help teams trace back decisions, verify billing data, and demonstrate compliance during financial audits.
Streamlining Multi-Step Billing Processes
In complex businesses, invoicing might occur in stages. For example, an initial deposit invoice, followed by a milestone invoice, and then a final invoice upon project completion. Custom templates can be built to support each stage with relevant placeholders, titles, and totals.
You might label the first template as “Initial Invoice,” including percentage calculations of total project cost, and note payment requirements. The next template could include a reference to prior payments and a new balance due. This structured approach improves transparency and helps clients track payments over time.
Archiving and Version Control for Templates
As templates evolve over time, managing their versions becomes important. Archived templates allow teams to reference past formats used for specific clients or campaigns. Version control ensures that edits do not unintentionally disrupt existing billing processes.
Each saved template can include metadata such as creator, last modified date, intended department, and usage count. This helps teams identify the most up-to-date version, compare changes, or roll back to a prior format if needed. Version history also plays a vital role in client disputes, compliance checks, and internal training.
Empowering Teams Through Role-Based Access
In large organizations, not everyone should have access to modify templates. Role-based access ensures that only authorized users can create, edit, or delete invoice layouts. Teams can be assigned permission levels, such as view-only, editor, or administrator.
This security layer protects your templates from accidental edits and ensures compliance with your internal billing policies. You can assign different templates to users based on department, role, or region, providing a more tailored and secure invoicing experience across the company.
Adapting Templates for Industry-Specific Requirements
Different industries have unique invoice expectations. A healthcare provider might need to include insurance codes, procedure descriptions, and patient references. A construction firm may require contract numbers, progress billing summaries, and retainage fields. A legal firm might include hourly billing breakdowns with case numbers and activity logs.
Templates can be tailored to reflect these specific needs without requiring manual redesigns for each invoice. By building industry-specific layouts, businesses ensure regulatory compliance, improve client understanding, and support their internal documentation needs.
Scaling Invoicing Across Franchises or Branches
For businesses with multiple branches, franchises, or regional offices, consistency in invoicing is essential. Custom templates allow each unit to include their specific contact details, tax ID, and banking information while preserving overall brand identity.
Templates can be shared across units or assigned centrally, ensuring that all invoices meet corporate standards while still being locally relevant. Centralized management with local customization strikes a balance between operational autonomy and brand consistency.
Conclusion
Custom invoice layout templates are far more than cosmetic enhancements—they are strategic tools that influence how your business communicates, manages cash flow, maintains compliance, and enhances the customer experience. From their initial design to full integration into daily operations, these templates can shape the efficiency and professionalism of your billing process.
We explored how to build a custom invoice layout from scratch, focusing on the foundational elements such as headers, line items, branding, and essential placeholders. This set the stage for businesses to move beyond generic templates and create documents tailored to their workflows and audience.
We expanded on this by diving into layout optimization. We examined how to structure invoices for clarity, accommodate different billing models, and maintain legal compliance, while also emphasizing the importance of branding, personalization, and adaptability. A well-optimized invoice doesn’t just look good—it makes information easier to understand and ensures clients can respond promptly.
Finally, we covered automation, integration, and scale. It highlighted how custom templates can be embedded into your CRM, accounting software, and broader operational systems to reduce manual tasks, ensure timely billing, and support strategic financial tracking. With the right tools in place, templates can support international operations, batch processing, industry-specific needs, and even real-time analytics.
When thoughtfully designed and strategically implemented, custom invoice templates become more than documents—they become operational assets. They streamline internal workflows, foster clearer communication, improve payment timelines, and reinforce your brand identity at every touchpoint.
Whether you’re a freelancer or a growing enterprise, investing in your invoicing process through customization, automation, and optimization is not just a matter of convenience—it’s a powerful move toward greater financial efficiency and professional excellence.