Why Choose Word for Invoicing
Microsoft Word is widely used, accessible, and often already installed on many computers. It allows users to quickly create invoices without learning new software. Templates speed up the process while still allowing customization for logo, colors, and branding. Word’s ease of use means that even those with minimal technical skills can design a structured invoice layout, insert tables, and save their work in editable or PDF formats.
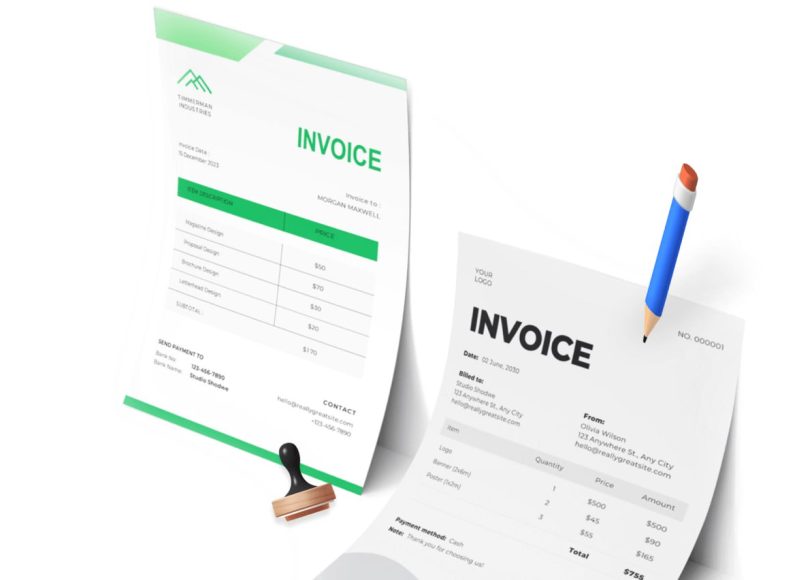
Understanding Invoice Essentials
A well-designed invoice is both a billing statement and a record of the transaction. It must include key elements such as sender and recipient information, invoice number, date, payment due date, itemized charges, taxes, total amount due, and payment instructions. These essential details ensure legal clarity, smooth payment processing, and easier record-keeping. Using Word to create invoices requires attention to formatting and consistency to ensure each invoice serves its purpose effectively.
Starting with a Word Invoice Template
Using a template is the quickest way to generate an invoice. Open Word and navigate to File → New, then search for “invoice” in the template gallery. Choose a layout suited to your business—options range from basic to detailed. Once selected, click “Create” to open a preformatted document with placeholders you can fill in. Templates typically include fields for invoice number, date, client information, item descriptions, quantities, unit prices, taxes, and total. Customizing these placeholders ensures that your invoices contain all mandatory information and look professional.
Customizing the Template Layout
After opening your chosen template, replace placeholder text with your business logo, name, address, and contact details. Adjust the header style to emphasize key information like invoice date and number. Change table formats to match your workflow: add or remove columns, insert rows for line items, and resize fields for better spacing. Even minor layout tweaks—such as font size, color, and spacing—can improve readability and reinforce your brand identity. Aim for clarity over decoration.
Inserting Logo and Brand Elements
Branding strengthens professionalism. To add your logo, click Insert → Pictures and choose your image file. Resize and position the logo within the header. Next, adjust font choices and colors to align with your visual identity. Consistent use of brand fonts and colors improves recognition and builds credibility. Keep design elements balanced: avoid overwhelming the client with bright colors or heavy graphics.
Entering Invoice Metadata
Critical metadata includes invoice number, date, due date, and client details. Generate invoice numbers using simple sequential numbering or date-based formats like 2025-001. This aids in tracking and audit trails. Use Word’s date field (Insert → Date & Time) to maintain formatting consistency. Client information—name, address, and email—should be accurate and match the contact on record. Correct client details help prevent payment delays caused by mismatched information.
Building an Itemized Table
Create a table that separates descriptions, quantities, unit prices, taxes, and totals. To insert a table, click Insert → Table and select the needed rows and columns. Label each column clearly (e.g., Description, Quantity, Rate, Line Total). For service-based businesses, include an Hours column; product businesses may need SKU or item codes. Ensure numeric values are right-aligned for readability. Though Word does not calculate automatically, you can add basic table formulas (Layout → Formula) to sum columns, but always cross-check accuracy.
Calculating Totals and Taxes
Below the item table, allocate space for subtotal, tax amount, discounts, and final total. Clearly label each to avoid confusion. For example:
Subtotal: $2,500
Sales Tax (10%): $250
Total Amount Due: $2,750
Choose whether to show rates as percentages, fixed amounts, or both. If you offer discounts, state them as a line item (e.g., Early Payment Discount). This transparency helps clients verify billing and reduces dispute risk.
Adding Payment Instructions and Terms
Include a section for payment instructions and terms. Specify payment methods (bank transfer, cheque, mobile payment) and necessary details (bank name, account number, routing number, IBAN, SWIFT). Clearly state the due date and any late fees (e.g., “Payment due within 30 days. Late payments subject to 5% monthly charge.”). If you require deposits or instalments, explain conditions and timelines. Well-defined terms protect both parties and can improve cash flow.
Ensuring Clarity and Professional Formatting
Avoid clutter by organizing each section with consistent font size and clear headings (e.g., Bill To, Invoice Number, Description). Use left alignment for text and right alignment for numeric figures. Maintain uniform spacing between table rows and sections. Proofread thoroughly to correct typos, misaligned elements, or missing fields. A polished appearance reassures clients and enhances invoice legitimacy.
Saving and Exporting the Invoice
Once finalized, save the document in two formats: editable (.docx) and fixed-format PDF. PDF format preserves layout, prevents accidental edits, and enhances compatibility when emailing. In Word, go to File → Save As, select .docx, then repeat with PDF format. Use clear filenames such as “Invoice_2025-001_ClientName.pdf” to organize files and prevent confusion.
Sharing the Invoice with Clients
Deliver the invoice using methods that suit your clients. Email is efficient—attach the PDF and include a polite message with invoice summary, due date, and payment instructions. Confirm receipt with a follow-up email if necessary. If clients prefer print, print on quality paper and mail to the billing address. Regardless of format, track invoices using a spreadsheet or accounting tracker.
Maintaining Invoice Records
Effective record-keeping is essential. Create a folder structure for invoices, organized by year and client. Maintain a tracking sheet with invoice numbers, dates, clients, amounts, payment status, and follow-up notes. This helps avoid duplicate billing, discover outstanding invoices, and simplify tax preparation. Back up files on a secure cloud service or external drive to prevent data loss.
Backup and Security Measures
Protect sensitive information by securing your invoice files. Use strong passwords or encrypted storage for folders containing billing documents. Word allows password protection (File → Info → Protect Document). Encrypt PDFs or send password-protected attachments via email if needed. Secure copies help safeguard financial data and client privacy in case of unauthorized access.
Pros and Cons of Word Invoicing
In summary, Word offers an accessible, customizable invoicing solution with minimal cost and strong document control. It works well for single, infrequent billing needs. However, it lacks automation, payment integration, and tracking features. As invoice volume increases, manual processes become time-consuming and prone to errors.
How to Access Word Invoice Templates
To access invoice templates in Microsoft Word, launch the application and click on File → New. In the search bar that appears, type “invoice.” You will see a gallery of professionally designed invoice templates. These templates vary in structure, style, and complexity. Select the one that best suits your business needs by clicking on it and choosing Create. Once opened, the template will appear as a new document, ready for customization.
Types of Templates Available in Word
Word offers a range of invoice templates that cater to different industries and business models. Some of the most commonly used types include:
- Service invoice templates, ideal for consultants and freelancers who charge for hours worked or fixed services
- Sales invoice templates, used by businesses that sell physical goods
- Simple invoice templates, for straightforward billing without excessive detail
- Detailed or itemized invoice templates, for businesses that need to track multiple line items, quantities, and taxes
- Pro forma invoice templates, useful for sending quotes or estimates before final billing
Each template includes placeholders for essential information such as client name, contact details, invoice number, date, description of products or services, cost, taxes, and total amount due.
Selecting the Right Template for Your Business
Choosing the right invoice template depends on the nature of your business. For example, a freelance writer may prefer a service-based template with columns for hourly rate and total hours worked. A small retail shop, on the other hand, might benefit more from a sales invoice template that includes item quantity, unit price, and applicable tax rates. If your business involves recurring billing, look for templates that make it easy to duplicate or update invoice details quickly. Selecting the right layout ensures that both you and your client understand the charges clearly.
Customizing the Template to Fit Your Brand
Once you’ve selected a suitable template, the next step is to customize it. Insert your business name and logo at the top of the invoice, typically in the header section. Update the address, phone number, and email fields with your contact information. Customize font styles, sizes, and colors to align with your branding. Add your company tagline or slogan if desired. A branded invoice creates a more professional appearance and builds trust with clients.
Modifying Table Layouts for Specific Needs
Most invoice templates in Word include a table for listing items or services. If your template does not have the exact columns you need, you can easily modify it. Click anywhere in the table to open the Table Tools menu, which includes options for adding or deleting rows and columns, merging cells, and adjusting alignment. Common customizations include adding columns for SKU numbers, adjusting tax fields for different jurisdictions, or including extra notes related to services rendered.
Using Form Fields for Reusability
Although Word does not offer true form functionality like Excel or PDF editors, you can make your invoice templates more reusable by inserting placeholder text. For example, insert tags such as [Client Name], [Invoice Date], or [Total Due]. When reusing the template, these tags act as reminders for where to update specific information. This simple method reduces the chances of leaving outdated client data in your invoices.
Adding Tax Information Accurately
If your business operates in a region where tax is required, make sure your invoice includes a line for tax calculations. In your template’s total section, add fields for Subtotal, Tax Rate, Tax Amount, and Total Due. Clearly state whether tax is included in the item price or added afterward. This transparency helps clients understand charges and reduces queries or disputes. You can also note your tax registration number if legally required.
Including Payment Terms and Notes
A professional invoice should always include payment terms, such as payment due date, preferred payment methods, and late payment penalties. Include this information either below the total section or as a note at the bottom of the invoice. For example, “Payment due within 14 days by bank transfer or PayPal. A 2% late fee will apply after 30 days.” You can also include a thank-you note or additional comments that personalize the communication with the client.
Creating a Template Library for Different Scenarios
Instead of using one generic invoice template for all situations, consider building a small library of templates for different needs. You might create separate templates for:
- Hourly services
- Fixed-rate projects
- Product sales
- Recurring invoices
- International billing with currency conversion
Saving each as a uniquely named file allows you to quickly select and modify the most appropriate one without reformatting each time.
Managing Templates for Recurring Use
Once your template is customized, save it as a Word template file (.dotx) rather than a standard Word document (.docx). This way, when you open the file, it creates a new document each time instead of overwriting the template. To do this, click File → Save As and choose Word Template in the Save as type dropdown menu. Name the file appropriately, such as “Service_Invoice_Template.dotx” or “Retail_Sales_Invoice_Template.dotx.” Store these templates in an easily accessible folder.
Advantages of Using Templates Over Starting from Scratch
Templates save significant time, reduce formatting errors, and ensure consistency across all your invoices. They also help new team members or assistants follow a standard process. Over time, they create a uniform brand image and minimize the chance of leaving out important details like invoice number, tax, or payment instructions. With one-time setup and occasional updates, templates simplify your billing process.
Template Limitations to Consider
Despite their benefits, Word templates have limitations. They don’t perform automatic calculations unless you manually insert formulas, which are limited in Word compared to Excel. They also lack integration with payment gateways or accounting tools. If your business grows and starts handling higher invoice volumes, the manual nature of Word templates can become time-consuming and error-prone. At that point, moving to invoicing software may be a better option.
Tips for Making the Most of Word Invoice Templates
To use Word templates efficiently, consider the following tips:
- Always keep a clean, untouched version of each template for reference
- Create a checklist of fields to update before sending each invoice.
- Double-check calculations before finalizing.g
- Export final invoices as PDF pto preserve the layout and prevent accidental edits.
- Use clear naming conventions for saved invoices (e.g., Invoice_2025-004_ClientName.pdf)
These small practices can prevent invoicing errors, ensure professionalism, and speed up the billing cycle.
Comparing Word Templates with Other Free Tools
Free templates in Word are easy to use, but they can’t match the automation offered by online invoicing tools. Platforms like Google Docs, Excel, and free invoice generators allow for better collaboration and data manipulation. If you frequently update invoices with formula-based totals or need more control over shared access, these other tools might be more suitable. However, for quick, simple needs, Word remains a reliable option.
When to Update or Redesign Templates
Your business needs may evolve. Perhaps you begin offering bundled packages, need to show different tax brackets, or switch to a new brand logo. In these cases, revisit your templates and make necessary adjustments. An outdated template with old contact details or incorrect tax rates can lead to delays in payment or confusion. Schedule regular reviews of your templates, at least quarterly or biannually.
Why Invoice Tracking Is Essential
An untracked invoice is easily forgotten. If you don’t monitor due dates or payment statuses, unpaid invoices can slip through the cracks, affecting your cash flow. Tracking invoices also helps maintain financial accuracy, improves tax readiness, and makes audits less stressful. It also supports your reputation by keeping your billing process professional and consistent.
Setting Up a Manual Invoice Tracker
One of the simplest ways to track Word invoices is through a spreadsheet. Whether you use Microsoft Excel or Google Sheets, the idea is to maintain a master list that includes critical details about each invoice. Typical columns include:
- Invoice number
- Client name
- Date issued
- Payment due date
- Amount
- Payment status (Paid, Unpaid, Overdue)
- Notes or follow-up reminders
This manual system works well for freelancers and small businesses handling fewer invoices. You can easily sort, filter, and update records as needed.
Creating a Consistent Invoice Numbering System
A solid tracking system starts with consistent invoice numbers. Without them, it’s hard to reference a specific document later. Develop a format like INV2025-001, INV2025-002, and so on. This format clearly shows the year and sequential invoice count. You can also add client initials or project codes if you manage multiple clients or billing streams. Once a pattern is in place, stick with it for clarity and reliability.
Filing Digital Copies Systematically
Digital organization matters just as much as record-keeping. Create folders on your computer or cloud storage for each year or client. Within each folder, store invoices as PDFs, using a naming convention such as:
Invoice_2025-001_JohnDoe.pdf
This approach allows you to quickly locate any document without having to open multiple files. Save your editable Word versions in a separate folder for revisions, and use PDFs for final versions you send to clients.
Following Up on Unpaid Invoices
Even with the best clients, delays can happen. That’s why follow-up is essential. Use your spreadsheet to track due dates and filter invoices marked as unpaid. Set calendar reminders three days before the due date and again on the due date itself. If a client has not paid by the due date, send a polite follow-up email. Include the original invoice, mention the amount due, and ask if they require additional information. A sample follow-up message might be:
“Hi [Client Name], I hope you’re well. Just a friendly reminder that invoice #INV2025-005 dated [Date] for [Amount] is due today. Please let me know if you need anything further to process the payment.”
Dealing with Overdue Invoices
If an invoice remains unpaid beyond the due date, it becomes overdue. In such cases, maintain professionalism and consistency. Send a follow-up email clearly stating that the payment is overdue, and politely request immediate settlement. You can also include your late fee policy if you mentioned it earlier on the invoice. Keeping a note in your tracker with dates of follow-up helps you stay on top of communication and shows clients you are serious about timely payments.
Using Conditional Formatting in Spreadsheets
To improve visibility, apply conditional formatting in Excel or Google Sheets. For instance:
- Highlight unpaid invoices in red
- Highlight invoices due in the next 3 days in yellow.w
- Mark paid invoices in green.
This color-coded system helps you prioritize follow-ups and gives you a quick overview of your financial situation at a glance.
Calculating Totals Automatically
Use formulas in your tracker to calculate totals such as:
- Total amount invoiced
- Total paid
- Total outstanding
- Total overdue
Use Excel’s SUM and IF functions to automate these figures. For example, use =SUMIF(Status, “Paid”, Amount) to calculate total payments received. This saves time and gives you real-time insights into your earnings.
Linking Invoice Files to Your Tracker
To streamline your system, you can add hyperlinks in your tracker to open individual invoice files. In Excel, right-click on a cell and select Link, then browse and connect it to the PDF or Word document. This way, you can access the actual invoice directly from your spreadsheet without searching through folders manually.
Keeping a Payment Log
In addition to tracking invoice status, keep a log of actual payments received. Record the date of payment, payment method (bank, PayPal, check), transaction reference number, and any notes. This helps reconcile your bank statements and simplifies end-of-year accounting. For recurring clients, this log also helps identify payment patterns and average turnaround time.
Backup and Data Protection
Store your tracker and invoices on a cloud platform like Google Drive, Dropbox, or OneDrive. This ensures data safety and access from any device. Additionally, back up files periodically to an external hard drive in case of accidental deletion or system crashes. If you store client-sensitive data, make sure your files are password-protected or encrypted. Word documents and PDFs allow password protection under the Save or Export settings.
Using Reminders and Alerts
Set reminders for due dates using digital calendars such as Google Calendar or Outlook. Create events for invoice follow-ups, especially for larger amounts or first-time clients. Use alerts at regular intervals (3 days before, on the due date, and 3 days after). This habit ensures you never forget to follow up and reinforces professional reliability.
Keeping Clients Informed About Payment Status
Some clients may prefer periodic reminders or payment statements. You can use your tracker to prepare a quick summary showing all outstanding invoices. Send this once a month or quarterly, depending on the arrangement. These summaries act as gentle nudges for clients who manage multiple payments and might overlook one. Keeping clients informed reflects transparency and encourages timely payment.
Maintaining Clean Records for Tax and Audit
During tax season, clean and complete records are essential. Your tracker helps categorize income, verify earnings, and validate claims. It simplifies the work for your accountant or tax preparer. Make sure to label all invoices by year and ensure your totals match your reported income. Good records also protect you in case of tax audits, providing verifiable documentation of every transaction.
Archiving Old Invoices
Once an invoice is paid and the transaction is complete, move it to an archive folder labeled by year. Keep at least seven years of records for tax purposes or as required by your local laws. If a client requests a copy later, having archives saves time and demonstrates professionalism.
Considerations for Switching to Automation
If your business starts generating more than 10 to 15 invoices a month, a manual system may become too demanding. In such cases, it’s worth considering an invoicing tool that automatically tracks, sends reminders, and logs payments. However, if your invoicing remains limited and simple, a well-managed Word system with a spreadsheet tracker is still a solid approach.
Common Mistakes to Avoid When Invoicing with Word
Microsoft Word provides a convenient and accessible tool for creating invoices, but without proper care, even small mistakes can lead to late payments, client confusion, or reputational harm. We’ll examine common errors people make when invoicing with Word and offer practical tips to avoid them. By recognizing these pitfalls early, you can refine your invoicing process and maintain a more professional and dependable business presence.
Mistake 1: Using Inconsistent Formatting
Inconsistent formatting is one of the most common problems in Word-based invoices. This includes misaligned text, multiple font styles, irregular spacing, and inconsistent color schemes. Such invoices look unprofessional and can be difficult for clients to read. Always use a consistent font (e.g., Arial or Calibri), maintain proper alignment, and ensure that elements like headers, table rows, and totals are neatly structured. Save a master template to prevent formatting drift when editing invoices.
Mistake 2: Forgetting to Update Invoice Numbers
Reusing or skipping invoice numbers creates confusion during payment tracking and auditing. Forgetting to change the invoice number when duplicating a previous file is easy to do in Word. To avoid this, create a manual invoice log or use a separate tracker in Excel to record each issued invoice with its corresponding number. Stick to a numbering format that includes the year and sequence, like INV-2025-017, and cross-check before sending the final version.
Mistake 3: Leaving Out Critical Information
Another frequent issue is omitting essential invoice components such as client details, invoice dates, due dates, or payment terms. Missing these can delay payment or cause miscommunication. Always ensure your invoice includes:
- Your business name and contact information
- Client name and address
- Unique invoice number
- Invoice date and due date
- Itemized list of services or products
- Subtotal, tax, and total due
- Payment terms and accepted methods
Use a checklist or template with labeled placeholders to make sure nothing is left out.
Mistake 4: Failing to Save or Send the Invoice as a PDF
Sending invoices as editable Word documents is risky. Clients may accidentally modify or misread information. PDFs, on the other hand, preserve formatting and prevent accidental edits. Before sending your invoice, always export it to PDF via File → Save As → PDF. This ensures professional presentation and data integrity.
Mistake 5: Incorrect Tax or Currency Calculations
Manually calculating taxes or currency conversions in Word is prone to human error. For example, forgetting to multiply quantities by rates or misapplying tax percentages can result in incorrect totals. If you operate in multiple tax jurisdictions or work internationally, double-check every line item and verify totals using a calculator or spreadsheet before finalizing. Include a note if taxes are included in the line price or added separately to avoid confusion.
Mistake 6: Ignoring Branding Elements
Neglecting branding—such as your logo, company colors, or consistent header/footer design—misses an opportunity to reinforce your business identity. Clients are more likely to remember and trust businesses with polished, cohesive branding. Customize your Word invoice template to include your logo, a branded color scheme, and your business tagline or slogan. Maintain these elements across all client communications.
Mistake 7: Using Overly Complicated Layouts
Some Word users overcomplicate their invoice templates by adding too many columns, colors, or unrelated design elements. While customization is important, simplicity is key. A clean, straightforward layout makes it easier for clients to understand what they’re being billed for. Avoid adding unnecessary borders, background images, or overly stylized fonts that can distract from the content.
Mistake 8: Not Clarifying Payment Terms
Vague or missing payment terms can result in delayed payments. Terms like “due upon receipt” may be misinterpreted. Always specify the due date and clarify acceptable payment methods. For example, “Payment due within 14 days via bank transfer or PayPal. A 1.5% monthly late fee will apply after the due date.” You can place this under the invoice total or in a dedicated notes section.
Mistake 9: Reusing Old Invoices Without Careful Editing
It’s common to duplicate an old invoice for speed, but failing to update all the relevant fields can result in sending incorrect information to a client. This may include previous client names, outdated project descriptions, or old amounts. Always perform a full review before finalizing a new invoice based on an old one. Look through each section to ensure it reflects the current client and project accurately.
Mistake 10: Poor File Organization
Saving invoices in random folders or with unclear filenames (like “invoice3final.docx”) makes record-keeping and retrieval difficult. Instead, establish a structured folder system and a consistent file naming convention. For example:
- Folder: Invoices → 2025 → January
- File name: Invoice_2025-011_ClientName.pdf
This helps you stay organized and find documents quickly, especially during tax time or client disputes.
Mistake 11: No System for Tracking Paid vs. Unpaid
If you don’t track which invoices have been paid, you risk losing revenue. Without automation, it’s easy to forget who paid and when. Use a manual spreadsheet tracker to log payment status, dates, and amounts. Mark invoices as Paid, Unpaid, or Overdue. Add filters or color codes to help prioritize follow-ups. Regularly updating this tracker can save hours of searching and confusion later.
Mistake 12: Not Following Up on Outstanding Payments
Some small businesses hesitate to follow up on unpaid invoices. However, clients are often busy and may simply need a gentle reminder. Set calendar alerts for each invoice’s due date. If payment hasn’t been received within a few days, send a polite follow-up. For example:
“Hi [Client Name], I wanted to check in regarding Invoice #INV-2025-018, which was due on [Date]. Let me know if you have any questions or if it’s already in process.”
If payment is significantly overdue, follow up again with late fee reminders if previously agreed upon.
Mistake 13: Not Saving a Copy for Your Records
Forgetting to save a final version of each invoice (PDF or Word) is a common mistake that can create legal and tax problems. Every time you send an invoice, save a copy in both editable and PDF format. If possible, back up your entire invoice directory weekly to a cloud service or external drive to avoid data loss.
Mistake 14: Not Reviewing Before Sending
Small typos, incorrect names, or wrong totals can affect client trust and delay payments. Before sending your invoice, do a thorough review. Read it from top to bottom, check math accuracy, verify client details, and confirm that the file name is correct. Reviewing a PDF version can also help catch formatting issues that might not be obvious in the Word editor.
Mistake 15: Overlooking Late Fees or Early Payment Incentives
Many freelancers and small businesses neglect to include late fees or early payment incentives, which can motivate faster payments. Mention these clearly in your payment terms. For example, “Invoices unpaid after 30 days may incur a 2% late fee,” or “Pay within 7 days to receive a 5% discount.” These terms not only encourage timely payments but also reinforce a professional tone.
Tips to Improve Your Word-Based Invoicing System
Even if you continue using Word for invoicing, you can elevate the process with a few enhancements:
- Use template fields or bookmarks for frequently updated elements
- Keep a separate Word file with client details to copy and paste accurately.
- Combine Word with Excel to handle calculations more reliably.y
- Schedule weekly reviews of outstanding invoices.
- Periodically review and update your template for branding or compliance changes.
These practices make Word-based invoicing more efficient, reliable, and scalable.
When to Consider Switching from Word
While Word is a good starting point, businesses that grow beyond a few monthly invoices may find its limitations too restrictive. Consider moving to a dedicated invoicing tool when you:
- Need automation for sending or tracking invoices
- Want real-time payment integration.
- Handle multiple currencies or tax jurisdictions.
- Require client portals or recurring billing.
- Prefer built-in reporting aaanalyticss
Transitioning to invoicing software can improve accuracy, save time, and enhance your client experience.
Conclusion:
Mistakes in Word-based invoicing can cost time, money, and credibility. By identifying common errors and applying simple best practices, you can maintain a professional, organized, and effective billing system. Whether you stick with Word or eventually upgrade to automated tools, understanding the foundation of good invoicing practices will always serve you well. Keep your invoices clear, consistent, and error-free, and your cash flow will follow.