Step 1: Choose a Content Management System
The content management system, or CMS, is the backbone of your online store. It determines how easily you can set up, maintain, and scale your digital presence. When selecting a CMS, key factors to consider include ease of use, integration with payment gateways, scalability, and availability of support and community resources.
Choose a CMS that aligns with your technical expertise and business size. A good platform offers an intuitive dashboard, built-in shopping cart functionality, and tools to manage inventory, orders, customer communications, and promotions. Once you’ve created an account, the next step is to choose a plan that suits your budget and business needs.
You’ll then need to connect your domain name to your new website. This process is usually straightforward, especially if your domain registrar provides built-in support for popular e-commerce platforms. You can follow the platform’s guidance to point your domain to the correct name servers and make your online store publicly accessible.
Step 2: Select a Theme for Your Store
Visual presentation is a powerful tool for shaping first impressions. The theme you choose defines the layout, typography, color scheme, and overall aesthetics of your online store. Most e-commerce CMS platforms offer a wide selection of free and paid themes, many of which are optimized for different industries and business types.
When choosing a theme, select one that mirrors your brand’s identity. If your brand conveys luxury, look for clean, minimalist layouts with elegant fonts. If it’s fun and creative, choose bright colors and playful designs. Once you’ve selected a theme, personalize it to your liking. Modify fonts, colors, banner images, and homepage layout to ensure consistency with your existing offline brand experience.
Responsive design is critical, so ensure your chosen theme adapts seamlessly to mobile devices and tablets. A growing number of customers shop via mobile, and a mobile-optimized experience improves navigation and conversion rates.
Step 3: Build Your Store’s Key Pages
Before going live, you need to build out your core web pages. These foundational elements guide your visitors, provide essential information, and help establish trust. Start by developing the following key areas:
Homepage
The homepage acts as the entryway to your online store. It should introduce your brand, showcase your most important products or categories, and highlight current promotions. Keep the design clean and uncluttered. Use banners and calls to action to guide customers toward your product catalog or featured collections.
A strong homepage includes visual hierarchy and intentional structure. Display a welcome message, product highlights, and brand messaging. Link to major categories such as new arrivals, best-sellers, or seasonal specials. Include elements that build credibility, like customer reviews or trust badges.
Shipping Information
Customers value transparency, especially when it comes to delivery. Create a dedicated page explaining your shipping policy, including timeframes, costs, geographic coverage, and order processing time.
This page should answer common questions and eliminate uncertainty. If you offer flat-rate shipping, free delivery over a certain threshold, or express options, state those clearly. Be upfront about any international delivery limitations or restrictions.
Include information about order tracking, estimated delivery windows, and your return or exchange process. Addressing these concerns ahead of time improves customer confidence and reduces inquiries.
Contact Page
Easy communication builds trust and improves the customer experience. Create a contact page with clear options to get in touch. Include a contact form, your business email address, phone number, and operating hours. If you run a physical storefront or office, list the address and embed a map for convenience.
You may also want to include links to your business’s social media pages. Many customers prefer to interact through channels like Facebook, Instagram, or WhatsApp. The goal is to provide multiple touchpoints so customers feel comfortable reaching out in the way that suits them best.
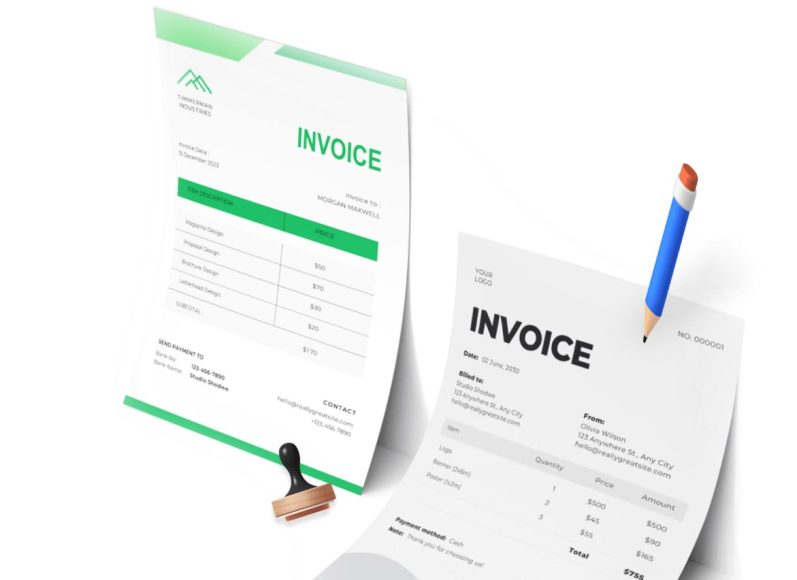
Product Pages
Your product pages are the most crucial component of your e-commerce site. They serve as both a marketing tool and a decision-making resource for your visitors. Each product should have its own dedicated page with a combination of imagery, descriptive content, and purchase options.
For each product listing, include the following elements:
- Product name
- High-quality images from multiple angles
- Concise, engaging descriptions
- Price and any discounts or special offers
- Size, color, or style variations
- Inventory status
- Shipping or delivery notes
Effective product descriptions don’t just inform; they persuade. Go beyond listing features to explain how the product benefits the customer. Use clear, relatable language and keep the tone consistent with your brand voice. Consider including customer reviews or testimonials to add social proof.
Step 4: Upload Your Products
Once your pages are built, it’s time to populate your online store with inventory. Uploading your products can be done manually or in bulk, depending on the size of your catalog and the features your CMS offers.
Most platforms provide spreadsheet templates (usually in .csv format) that allow you to upload multiple items at once. This method is ideal if you have dozens or hundreds of products. If your product range is limited, uploading items individually may allow for greater attention to detail.
Organize your products into logical categories. This improves navigation and makes it easier for customers to find what they’re looking for. For example, a clothing retailer might use categories like men’s apparel, women’s apparel, accessories, and footwear.
Each product should include:
- Product title
- A short summary
- Long description with specifications
- Pricing and promotional details
- Tags and metadata for search optimization
- Availability status
High-resolution product images are essential. Use consistent lighting and neutral backgrounds. Where possible, include lifestyle images that show the product in use, as these help shoppers visualize how the product fits into their lives.
Ensure you test your product pages thoroughly. Check for typos, missing information, broken image links, or confusing layouts. A polished presentation not only builds trust but also enhances conversion rates.
Step 5: Set Up Shipping Options
Shipping plays a critical role in customer satisfaction. Transparent and affordable shipping options can be the difference between a sale and an abandoned cart. It’s important to find the right balance between speed, cost, and logistics while aligning with your business model.
Modern consumers expect fast, reliable delivery at a reasonable price—or even better, for free. While offering free shipping may seem like a burden on margins, it can actually boost conversion rates and encourage larger orders when implemented strategically. For instance, setting a minimum purchase amount to qualify for free shipping not only incentivizes higher order values but also helps you recover costs.
Consider offering multiple shipping options to suit different customer needs. Some may prefer economical standard delivery, while others are willing to pay a premium for express services. Providing choice empowers customers and improves satisfaction.
Clear communication is key. Ensure shipping timelines, fees, and service limitations are prominently displayed on product pages and during checkout. Unexpected costs at the end of a purchase journey are one of the leading causes of cart abandonment.
It’s also wise to include tracking capabilities with your shipments. Tracking updates help manage customer expectations and reduce the volume of support inquiries, while also adding a layer of professionalism to your service.
Simplify Your Shipping Strategy
To begin, decide whether you will handle shipping in-house or use third-party logistics providers. For small businesses, managing packing and delivery independently can be more cost-effective. This approach allows for greater control over packaging, timing, and customer service.
Acquire basic packing supplies such as boxes, tape, labels, and fillers. Purchase these in bulk from reliable office or postal supply providers to save on costs. Choose neutral, functional packaging unless branding is a high priority.
If you handle fulfillment yourself, consider setting standard processing times. Most customers expect prompt order processing, ideally within 24 to 48 hours of purchase.
Offer Local Delivery or Pickup
Adding local delivery options can create an added layer of convenience for nearby customers. Offering same-day or next-day delivery within a fixed radius provides faster service and reduces shipping expenses.
Alternatively, curbside or in-store pickup is a great way to attract local buyers while minimizing delivery overhead. This strategy also strengthens relationships with your community and encourages ongoing loyalty.
Define Shipping Rates and Zones
Set shipping rates based on package weight, delivery speed, and customer location. Many CMS platforms allow you to create zones—such as local, national, and international—and assign flat rates or real-time carrier-calculated fees.
Offering free shipping over a certain cart value is a widely used incentive. This approach boosts order sizes and improves conversion rates. Make sure to clearly communicate these offers across your site, especially on product pages and in the cart.
Communicate Your Shipping Policy
Make your shipping policy accessible and easy to understand. Cover aspects such as order processing times, estimated delivery durations, cost structures, and return procedures. Use clear language and avoid industry jargon.
Transparency in this area builds trust, reduces customer support inquiries, and sets realistic expectations that minimize dissatisfaction or disputes.
Step 6: Configure Payment Options
Accepting payments online is one of the most essential components of your e-commerce operation. Your choice of payment gateway influences both user experience and business efficiency.
Identify the Right Payment Methods
Start by considering your customer base. What forms of payment do they prefer? While credit and debit cards are universal, some customers prefer digital wallets, bank transfers, or local payment solutions.
Offering multiple payment options ensures broader accessibility and minimizes lost sales. At minimum, integrate the most popular choices within your market. This might include cards, wallet-based solutions, and buy-now-pay-later providers.
Check with your CMS to identify supported payment gateways. Most platforms provide detailed listings that show which providers are compatible by region and currency.
Set Up Payment Gateway Integration
Integrating a payment gateway into your store is usually straightforward. From your store’s backend, navigate to the payments section and select a provider. Enter your account credentials or API keys as instructed.
Enable necessary features such as automatic tax calculation, currency conversion, fraud protection, and order tracking. Some platforms support test environments that allow you to simulate transactions before going live, giving you a chance to verify functionality.
Ensure that your payment page uses SSL encryption. Secure connections are vital for protecting sensitive data and maintaining compliance with global security standards.
Review Transaction Fees and Policies
Different payment gateways come with varying transaction fees, refund policies, and settlement times. Review the fee structures carefully and consider how they affect your margins, especially on high-volume or high-value sales.
Factor in additional costs for currency conversion, chargebacks, and international transfers. Understanding these elements upfront will help you price your products effectively and plan your cash flow accurately.
Step 7: Create a Smooth Checkout Experience
The checkout process is a critical moment in the customer journey. A complicated or confusing checkout can lead to cart abandonment and lost revenue. Designing a smooth, user-friendly experience helps customers complete their purchase with confidence and ease.
Minimize Checkout Steps
Streamline your checkout by reducing the number of steps required. Use a single-page checkout if possible, where customers can enter shipping, billing, and payment details without switching screens.
Offer guest checkout alongside account creation. Forcing new users to register can be a barrier. Let customers decide whether to create an account based on their preference.
Pre-fill fields for returning users, and use smart defaults for country, currency, or delivery options when applicable. Every second saved in the process improves the likelihood of conversion.
Provide Transparent Cost Breakdown
Unexpected costs are a leading cause of cart abandonment. Clearly display a full cost summary during checkout, including item totals, taxes, shipping, and discounts. Allow customers to update quantities, change shipping options, or apply promo codes without restarting the process.
Be transparent about estimated delivery dates. Adding a shipping timeline based on customer location helps manage expectations and reduces anxiety about delayed deliveries.
Use Trust Indicators
Incorporate security badges, privacy statements, and refund policies prominently within the checkout. Reassuring customers that their data is secure makes them more likely to complete their purchase.
Also, display your return or cancellation policy with simple, clear language. Knowing they can easily resolve issues if needed reduces buyer hesitation.
Optimize for Mobile Devices
A large portion of e-commerce traffic now comes from smartphones and tablets. Your checkout must be optimized for smaller screens. Use large, tappable buttons, simple forms, and mobile-friendly payment integrations to make mobile purchases as frictionless as possible.
Test your checkout flow across different devices and browsers to identify any usability issues. Ensuring cross-platform compatibility is critical for maximizing conversions.
Enable Cart Recovery Features
If customers abandon their cart, you can still win them back. Enable cart recovery tools such as automated email reminders or pop-ups that offer incentives like a limited-time discount or free shipping.
Some CMS platforms offer native tools for abandoned cart management, while others support integrations with marketing automation services. Track and analyze cart abandonment data to refine your approach over time.
Strengthen Operational Readiness
Beyond payments and shipping, there are other elements that support your store’s operational success. Inventory tracking, customer notifications, and performance monitoring should be part of your daily routine.
Ensure your inventory is updated regularly. Use automatic stock deduction after purchases and low-stock alerts to maintain accurate availability.
Configure order confirmation emails, shipping notifications, and thank-you messages to enhance customer communication. These automated interactions improve customer satisfaction and build loyalty.
Use analytics tools to track key metrics such as conversion rate, cart abandonment, page load times, and traffic sources. Data-driven decision-making allows you to refine your strategy and improve overall store performance.
With your shipping and payment systems in place, your online store is now prepared to handle real transactions. We’ll focus on marketing your new e-commerce store, promoting your products, engaging your audience, and driving consistent traffic to grow your digital presence.
Promote Your Online Store
Promoting your store is essential for gaining traction and attracting your first wave of customers. Effective promotion combines digital strategies, email marketing, social media outreach, and even offline communication.
Start by creating a detailed promotional plan that outlines your key marketing activities leading up to and following your store’s launch. Assign timelines and responsibilities to ensure nothing falls through the cracks. Pre-launch marketing is just as important as post-launch efforts. Begin by teasing your audience with upcoming product reveals, behind-the-scenes glimpses, or launch countdowns to build anticipation and keep your brand top-of-mind.
Focus heavily on storytelling in your promotional content. People connect with brands that resonate with their values or solve a specific problem they face. Share the origin of your business, why you decided to go online, and what sets your products apart. Use compelling visuals, videos, and testimonials that reinforce your credibility and inspire trust.
You should also explore partnerships with influencers, bloggers, or local media outlets who can help amplify your message. Collaborations can drive new traffic to your store and expose your products to targeted niche audiences. Incentives like referral codes or affiliate programs can turn satisfied customers and advocates into powerful promotional assets.
Finally, remember that promotion is not a one-time effort—it’s an ongoing strategy. Stay consistent with your messaging, refine your content based on analytics, and always look for new ways to engage both new and returning customers.
Notify Your Existing Customers
If you have already built a customer base, use your communication channels to notify them of the transition. Send out an announcement email letting them know your store is now available online. If you maintain a mailing list, segment it and personalize the message to encourage engagement.
Be sure to include clear instructions on how customers can navigate your site, purchase items, and reach out if they have questions. Explain the benefits of shopping online, such as exclusive products, easier access, and convenient shipping options.
Consider sending follow-up reminders after the initial launch announcement. These can highlight new arrivals, special offers, or store features your customers may not yet have explored.
Use Social Media Strategically
Leverage your social media platforms to build excitement and drive traffic to your online store. Begin posting teasers before launch, such as behind-the-scenes content, product previews, or a countdown.
Once your store is live, share direct links to featured collections, limited-time deals, or bestsellers. Use platform-specific features like Instagram Stories, Facebook Events, or pinned tweets to draw attention to your launch.
Encourage interaction by running giveaways or contests where entry requires tagging friends, sharing posts, or signing up for your newsletter. These actions expand your reach and create buzz around your brand.
Create Promotional Content
Content marketing is a valuable tool for building authority and visibility. Create blog posts, videos, or infographics related to your niche or product offerings. Tutorials, product care guides, and behind-the-scenes looks into your business help build trust and increase organic traffic.
Make sure your content is optimized for search engines. Use relevant keywords, write compelling titles and meta descriptions, and structure your posts for readability. Over time, consistent publishing will drive traffic and improve your store’s visibility.
Update Online Listings
Ensure all your online business profiles reflect your new store. Update your Google Business profile with your website URL, store hours, and contact details. This allows your e-commerce site to appear in local search results and maps.
If you are listed on directories or review sites, revise your descriptions to include information about your online store. Consistency across platforms improves trust and helps new customers discover your business.
Utilize Paid Advertising
Investing in online ads can accelerate traffic growth and help you reach new audiences. Start with a small budget and test campaigns across platforms like Google Ads, Facebook Ads, or Instagram Promotions.
Use targeted ads based on location, interests, and browsing behavior to connect with potential customers. Highlight limited-time promotions, free shipping offers, or unique products to attract clicks.
Track the performance of each campaign closely. Monitor click-through rates, conversions, and cost-per-acquisition to refine your strategy over time.
In-Store and Offline Promotion
If you still maintain a physical store, use it as a channel to promote your online shop. Put up signs or posters announcing the new website. Train your team to mention it during checkout and encourage customers to explore the digital catalog.
Hand out printed materials such as business cards or flyers with your website address. Include a discount code or incentive for shopping online to encourage trial.
Community events, pop-up markets, and local partnerships can also be great platforms to share information about your e-commerce expansion.
Step 8: Launch Your Online Store
A well-executed launch event can generate momentum and build excitement around your new store. Launching with a plan gives your audience a reason to explore, engage, and buy.
Plan a Grand Opening Campaign
Treat your online launch like a real-world grand opening. Develop a campaign that includes email invitations, social media announcements, and a promotional calendar.
Consider offering limited-time discounts, exclusive products, or bonus items with first purchases. These types of incentives encourage immediate engagement and can help you gather early reviews and testimonials.
Create urgency with countdowns, first-come-first-serve offers, or reward tiers for early orders. Use compelling messaging and strong calls to action to guide customer behavior.
Engage Your Audience on Launch Day
On launch day, be active across all your channels. Share stories, livestream updates, and encourage user-generated content. Ask your audience to share their purchases or browsing experience online using a branded hashtag.
Engaging with your audience in real time builds community and strengthens relationships. Respond promptly to questions, thank customers for their support, and reshare their posts to foster excitement.
If possible, coordinate with influencers or local brand ambassadors to amplify your launch message. Collaborations bring credibility and expand your reach to new customer segments.
Monitor Performance and Feedback
After your launch, track how your store is performing. Use analytics tools provided by your CMS to evaluate traffic, page views, bounce rates, and conversion rates.
Pay attention to customer feedback received through emails, social media comments, or contact forms. Use this input to identify areas for improvement, such as confusing navigation, slow page loading, or unclear product descriptions.
Implement quick fixes for urgent issues and keep a running list of updates for future iterations. A successful launch is only the beginning; continuous refinement ensures long-term growth.
Continue Building Momentum
Keep the momentum going post-launch with ongoing campaigns. Run seasonal promotions, highlight new products, and keep your customers engaged through email marketing.
Collect and showcase customer reviews. Social proof is powerful and can be used in product pages, newsletters, and ads. Encourage satisfied customers to leave reviews by offering small incentives or follow-up messages after delivery.
Develop loyalty programs or referral incentives to reward repeat purchases and word-of-mouth marketing. Building a loyal base of repeat customers is more cost-effective than constantly acquiring new ones.
Sustain Growth Through Community and Innovation
Growing your e-commerce store over time involves more than one-off promotions. Invest in building a community around your brand. Share your business story, values, and mission to connect with customers on a deeper level.
Start a blog or regular newsletter to stay in touch with your audience. Share updates, tips, and stories that matter to them. Over time, this consistent communication strengthens loyalty and increases customer lifetime value.
Stay agile and keep an eye on emerging trends, technologies, and tools that enhance the online shopping experience. Test new strategies, experiment with different content formats, and remain open to change.
With consistent effort and a customer-first mindset, your online store can thrive in the digital marketplace. The work doesn’t end after setup—it evolves as your business and customers grow together.
Conclusion
Shifting your products online is more than just building a digital storefront—it’s about transforming the way your business connects with customers, adapts to change, and scales for growth. The journey from offline to online commerce can seem overwhelming at first, but breaking it down into structured, manageable steps allows you to approach it with clarity and confidence.
We explored how to lay the groundwork for your e-commerce presence. This involved selecting a content management system, choosing a store theme aligned with your brand, building essential web pages, and uploading your product inventory. These foundational elements shape your customer’s first impressions and determine how easily they can engage with your products.
We focused on the operational aspects that power a seamless shopping experience. You learned how to set up efficient and transparent shipping methods, configure flexible payment options, and streamline the checkout process. These technical elements ensure that your online store runs smoothly and professionally, minimizing friction and maximizing customer satisfaction.
Finally, walk you through launching and promoting your new online store. From engaging your current customers to reaching new audiences through social media, email marketing, and paid advertising, this final stage ensures that your digital storefront doesn’t just exist—it thrives. A strong launch helps generate excitement and build momentum, while continuous marketing and community-building sustain growth over time.
Transitioning your business online opens the door to new possibilities: broader market reach, improved resilience, and enhanced customer insights. It enables your business to operate around the clock and serves as a critical channel for adapting to evolving consumer behavior.
The key to lasting success in e-commerce lies in ongoing improvement. Monitor your store’s performance, listen to your customers, and remain flexible in the face of change. By focusing on the user experience and maintaining a strong brand presence, your online store can become a valuable asset that supports both short-term results and long-term business goals.
Now that your products are online and your store is up and running, the digital stage is set. Stay consistent, stay customer-focused, and enjoy the new opportunities that come with selling online.